Category

Recipes

Category

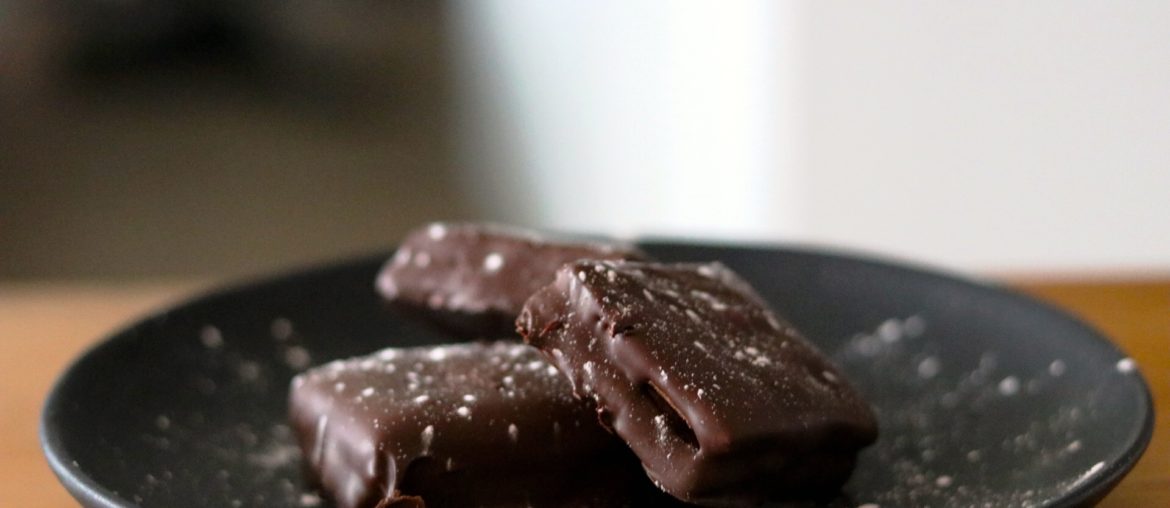
How to Make Tim Tams

“What’s your favourite cookie?”

I asked that to someone I was just getting to know recently.
Don’t ask me why, but it seems to be something that comes up with most people that I meet. Part of it is a weird fascination with wanting to know what people actually enjoy vs. what they think they should enjoy (the amount of times I have had people tell me they love stale oatmeal cookies, or undercooked chocolate chip cookies instead of saying a more “acceptable” answer like “fresh baked chocolate chip cookies with a crispy outside and gooey inside” has led me to believe that I am not the only one who is okay with a dessert or cookie that could be considered “wrong” from a traditional baking point of view). So when “TIM TAMS!” was blurted out with excitement I was surprised! I knew it was some sort of Australian dessert, but wasn’t entirely sure what it was. So always up for a challenge, I said I’d make him some homemade ones and he could tell me if they were better than store bought.

I realized quickly I should probably figure out exactly what it is. Wikipedia has this great description on them with their history here. But basically: “Tim Tam is a brand of chocolate biscuit made by the Australian biscuit company Arnott’s. It consists of two malted biscuits separated by a light chocolate cream filling and coated in a thin layer of textured chocolate.”

After searching for a few tips and tricks on how people made these, I headed into the kitchen and decided take a swing at these my way. I have shared these with not only the person who loves Tim Tams (who LOVED these) but also a few work partners of mine and friends and family. Every single one of them has come back asking for more. That’s always the best result!

Ingredients:
For the cookies:

1/2 Cup Unsalted Butter  (Do not try and sub in salted butter in this recipe)
1 Cup Icing Sugar
1 Egg at Room Temperature
1/3 Cup (Heaping) Unsweetened Cocoa Powder
1 Cup All Purpose Flour
Small Pinch of Salt

  1. Using a stand mixer fitted with the paddle, or a hand mixer and a large bowl, combine your room temperature butter, and powdered sugar and cream until it is nice and fluffy (it will likely become quite a pale colour, that is exactly what you want). Once that’s done, add in your egg and beat until it is incorporated. The colour should lighten a bit. Now add your cocoa powder and beat until smooth (you don’t want lumps). Now fold in your flour and salt (mix these together first) until everything is incorporated. Your dough should be soft and almost sticky.
  2. Layout a large sheet of wax/parchment paper and scrape out your dough onto this. Take a second sheet and place on top of your dough. Carefully, roll out the dough between these sheets making sure you are shaping it into a rectangle. You don’t want your dough too thick- roughly 1/4-1/3″ thick (remember, you’ll be stacking cookies on top of each other so you don’t want them too thick). Move this carefully onto a tray and place it in your freezer for 30-45 minutes until firm. (This way it won’t stick to the paper when you remove it).
  3. Preheat oven to 350F (if your oven tends to vary in temperature quite a bit, pump this to 370F. Now line baking sheets with parchment paper.
  4. Remove your dough from the freezer and with a sharp knife (or pizza cutter) and cut it into small squares (traditional Tim Tams are rectangles, but I found the square shape made for a much more pleasant eating experience). You should end up with roughly 22 or 24 squares (enough for 11-12 Tim Tams). Place these evenly on the baking trays and bake them for 10-12 minutes (you know they’re done when they almost have the look of a brownie on top. Don’t overcook them or they’ll be very dry). Leave them out to cool completely.

For the filling: 

1/2 Cup Unsalted Butter
1-1/4 Cup Icing Sugar
1 Heaping Tbsp unsweetened cocoa powder
1 Heaping Tbsp Ovaltine (if you don’t love malted drink powder, hot chocolate mix works well too)

  1. Using either a stand mixer or hand mixer, cream the butter and sugar. Sift in your cocoa powder and ovaltine. Using ~1Tbsp of icing per cooking, spread or pipe an even layer of filling on half of the cookies and top with the other cookies. Refrigerate.

For the Coating/Final Step:

1 Bag Chocolate Chips or 8oz Chocolate Squares (Milk or Dark Chocolate)
1 Tbsp Coconut Oil

  1. To make the coating, you can melt the chocolate on stove top (not my favourite) or in the easier (and really the only reason I use it) microwave. Combining the chocolate and oil, microwave on high in 30-second intervals, stirring between. After your second melt, you’re likely ready to go. (Should be smooth)
  2. Using a fork, dip the cookies into the melted chocolate and place them onto a cooling wrack (if you place them back onto the baking sheet I find the chocolate sticks to the pan). Once you’ve done this with all the cookies, place them back in the fridge until solid.

    Enjoy!
 

Holiday Menu for Hosting Guests

When given the opportunity to cook a dinner when there are no dietary restrictions, my mind tends to wander (in the best of ways) and I get to be really creative with what I put together. Depending on the group I have over, I’ll sometimes test recipes I haven’t made that often, or even try out something totally new. However, when it comes to the holidays, I like to stick to the tried and true- the old faithfuls that I have tweaked and edited over the last few years so that way everyone leaves with a guaranteed great meal. This may seem like the easy way out, but I like to view it as being as best prepared as possible!

With this menu, I decided to stray away from the traditional turkey, or ham, or fish, and go for something a little brighter! Each dish is warm and feels like you’re eating a hearty home cooked meal. With the weather being colder, I wanted to make sure my guests would be comfortable, and leave comfortable. Also, I wanted to make sure this was a meal I could mostly put together on the stovetop! Using Frigidaire’s induction stove top made these a breeze: I can always count on fast and even heat = a delicious result every time.

Here is my menu for my second holiday dinner:

Starter:

Creamy Mushrooms on Toasted French Bread

Main:

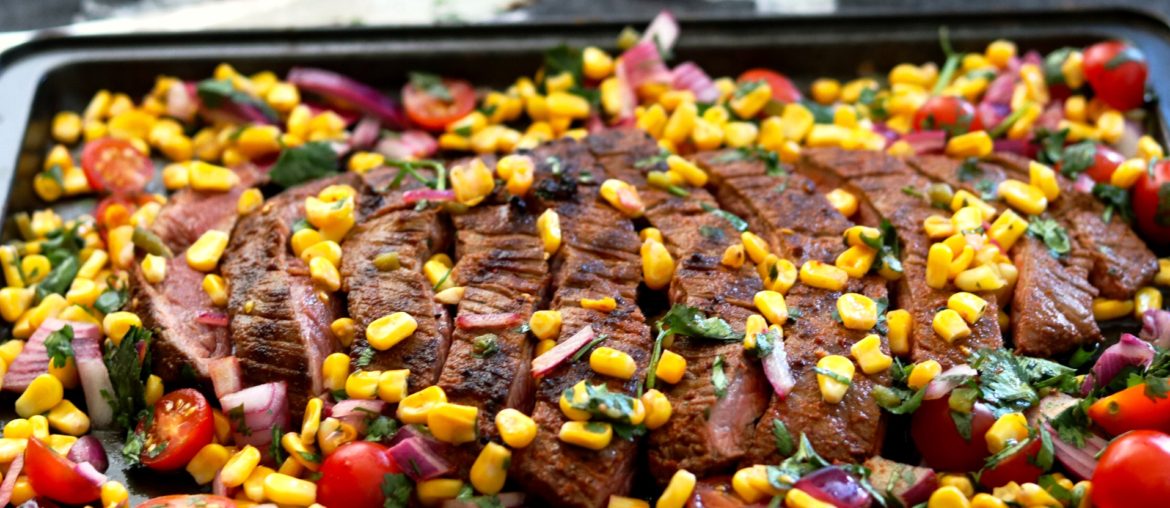
Dry Rub Flank Steak with Corn Salsa

Dessert:

Blueberry Galette

Creamy Mushrooms on Toasted French Bread

This is such a versatile dish- you can have it for breakfast, lunch, you can use it as a side or even on its own. For the purpose of this meal, I’m going to be using it as the starter for my guests. I wanted to make sure they had something warm as soon as they sat down that would cling to their insides while the rest of the food is being prepared. Using Frigidaire’s induction stove top makes heating up the cream really easy– it is really responsive and can go from simmering to boiling on-demand, ensuring you end up with the perfect finished product every time.

Ingredients:
2 Tbsp Olive Oil + 2 Tbsp for brushing
2 Tbsp Unsalted Butter
2 Garlic Clove
2 Tbsp chopped parsley
8 Tbsp 35% cream
800 g Finely Chopped Cremini Mushrooms
2 French Sticks (Cut into ~24 rounds)
(Sprouts optional)

Steps

  1. Heat oven to broil
  2. Place the oil and butter in a saucepan over a low heat. Add the garlic and cook for 1-2 minutes.
  3. Add the mushroom  and cook for a further 5-6 minutes, stirring occasionally.
  4. Add the cream and parsley to the pan and bring to a simmer.
  5. Cook until the cream has started to reduce, and you have a thick mushroom mixture- you don’t want it super runny.
  6. While cooking, brush the cut up bread with olive oil and place in the oven for 3-4 minutes or until broiled and golden brown.
  7. Serve the mushroom mix on the toasted bread and enjoy

creamy mushroom on toast


Dry Rub Flank Steak with Corn and Jalapeño Salsa

Ingredients:

Dry Rub:
2 heaping tablespoons brown sugar
1.5 tablespoon ancho chile powder
1.5 tablespoon paprika
2.5 teaspoons freshly ground black pepper
1.5 teaspoon cayenne pepper
1.5 teaspoon granulated garlic
1 heaping teaspoon mustard powder
1 teaspoon ground cumin
1 teaspoon thyme

Steak and Salsa:
2 tablespoons olive oil, plus more for grill
3 cups corn
1/4 large red onion,finely chopped
2 jalapeño finely chopped (I keep the seeds)
1 pint cherry tomatoes, halved
1 cup fresh cilantro, coarsely chopped
2 limes
freshly ground pepper
1 medium sized flank steak (about 1.5lbs- ask your butcher to get you the right size).

Dry rub:
Combine brown sugar, chile powder, paprika, salt, pepper, cayenne, granulated garlic, mustard powder, thyme and cumin in a small bowl.

Salsa:
Add your corn and jalapeño to a medium sized skillet on medium high heat. Cook for 5-10 minutes (closer to 10 if frozen corn). This will get everything hot and release some flavour from the pepper. Remove from heat and add in your onion, tomatoes, cilantro and juice the limes. Add in pepper and stir until well mixed. Set aside (or put in the fridge covered if you’re making your steak later)

The Rest:
Take your spice mix, and rub into each side of the steak (I lay it all out in a tray, and drag the steak through it, and then I packed the spices it didn’t catch and rub it into the steak by hand until it no longer falls off. Add a bit of olive oil to each side to keep everything on. Pre-heat your grill or grill pan until very hot. You only need about 4 minutes per side if you want medium rare (a bit longer if you have a thicker or bigger cut). Once cooked to your liking, remove from heat. DO NOT CUT RIGHT AWAY. Leave it for 10 minutes so the juices seal in. Once that’s done, I put it in the broiler on high for 1 minute or so. Serve by cutting against the grain and top with the salsa.


flank steak with corn salsa on top

Blueberry Galette

I always like to end my meals with something that has a bit of acid  to help with digesting, especially if there have been fatty foods. I find that this dessert sits nicely after a large meal and doesn’t feel too overwhelming. You definitely don’t feel bad going back for seconds.

Ingredients:
1 refrigerated pie crust (frozen works as well, just let it thaw briefly before using)
2 Cups of blueberries (fresh or frozen)
⅓ cup sugar
2 Tbsp  cornstarch or Tapioca powder
Juice of ½ Lemon
Zest from ½ Lemon
Pinch of salt
1 Tbsp butter divided into pea sized amounts
1 Egg
2 Tbsp raw sugar

  1. Preheat the oven to 450F.
  2. Prepare a baking dish with parchment paper and lay out the pie crust onto the baking sheet and set aside.
  3. In a bowl mix the berries (if you’re using frozen berries, let them thaw shortly first on the counter), sugar, cornstarch, lemon juice, zest and pinch of salt.
  4. Spoon the berry mixture onto the center of the pie crust.
  5. Gently pinch up the sides of the pie crust to make crust bowl for the berry mix (remember, you’re not putting another crust on top, and want the sides to act like a partial crust coming in)
  6. Pull the edges in towards the center as you pinch around the outside of the pie crust. Dot the top of the galette with the pea-sized butter pieces. When completed, set aside
  7. In a small bowl whisk the egg and a splash of water together. Paint the edges of the pie crust with the egg wash (when baking, this will give the crust a nice golden color without overbaking). When done, sprinkle the edges with the raw sugar (be generous, if you need more sugar, use more).
  8. Place in the oven on the center rack and bake for 20-25 minutes. Remove when the crust is golden and the center is bubbly.
  9. Let cool and serve with a sprig of fresh mint, or a scoop of your favorite ice cream.

blueberry galette

This post is Sponsored by Frigidiare Canada

Holiday Vegetarian Menu for Hosting Guests

The way I like to see it, there’s two types of people in life. Those who like to cook, and those who don’t. Growing up, I was one of the people who definitely did not like to cook. It was only after moving out that I started to venture into the kitchen.Over the last few years I have started hosting more and more dinner parties. These dinners have been for everything from “Let’s just have a dinner,” to Thanksgiving, Christmas, and the like. My favourite meals to cook and my favourite dinners to host are holiday meals however. Why? Well, there is something about people gathering for a holiday in your home, celebrating over food that you’ve made for them that is really rewarding. It brings you closer together and leaves you with memories that will last a lifetime.

I have a lot of foodie friends who love cooking (and like me, are in love with the new Black Stainless Steel appliances which make your kitchen look so much more refined) and they’re pretty divided between vegetarian and not. Now, this isn’t the most difficult thing to deal with when hosting but it is definitely something you need to be aware of when putting together your menu, how you keep your dishes (making sure nothing mixes) and how you serve. What I’ve come to do, is host two separate dinners- one totally vegetarian, and one not. This way there’s no chances of mistakes, of one side being served more than the other. Everyone gets the meals they love in the way they like them! I’m going to share with you the two menus I’m planning on making this year- my vegetarian menu, and my other menu!

*Note* I like to keep my menus fairly simple, because not only do you have to make multiple courses, but there is nothing worse than finding a recipe, and not having, or not being able to easily find the ingredients. All of my recipes are pretty straightforward with ingredients you can get year round at the local grocery store.

Starter:
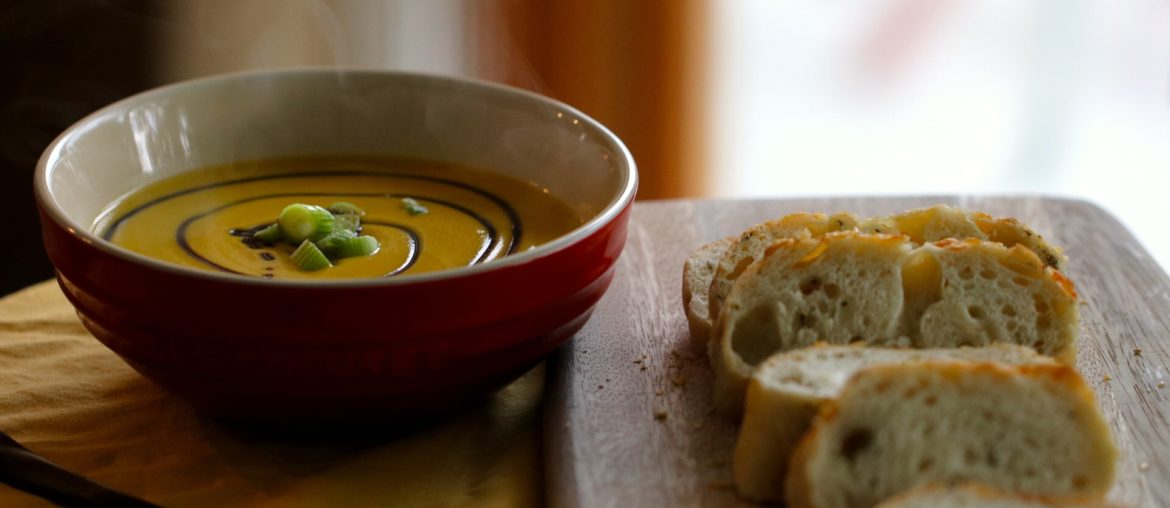
Parsnip and Apple Soup

Main:
Roasted Cauliflower with Wow This is So Good Sauce

Dessert:
Orange Cranberry Loaf


Parsnip and Apple Soup
(This is one of my favourite soups, and is a breeze to make. The Frigidaire Induction stovetops make cooking this really easy. Everything heats up and cooks that much faster, it’s easy to control the temperature so you don’t overheat or burn anything, and it’s a breeze to clean if you spill anything).

Ingredients:
1 tsp cumin seeds
1 tsp coriander seeds
1/2 tsp green cardamom seeds (from 3-4 pods)
40g butter
2 1/2 tsp olive oil
2 medium onion, chopped
700g  parsnips
3 garlic clove, crushed
5 cm fresh ginger, finely grated
1 tsp ground turmeric
1 tsp garam masala
150g peeled and chopped Golden Delicious apple (about 1 medium-size apple)
1.2L fresh vegetable stock
2 tbsp crème fraîche
1 tsp chopped chives to garnish

  1. Heat a small, dry frying pan over a medium-high heat. Add the cumin, coriander and cardamom seeds and shake them around for a few seconds until they begin to get a bit darker (you’ll also smell them toasting). Put these into a mortar and pestle or a pepper grinder and turn them into a powder.
  2. Heat the butter and oil in a medium-size pan. Add the onion and cover. Cook for 10 minutes until soft and lightly golden. Meanwhile, peel the parsnips and cut them into 2.5cm pieces. (Peeling is important or your soup won’t have a nice consistency).
  3. Uncover the pan, add the garlic, grated ginger and all the spices, then cook for 1 minute more. Add the parsnips, chopped apple and stock, then bring to the boil, cover and simmer. Simmer for 45-60 minutes or until the parsnips are tender when you poke them with a knife.
  4. Remove soup from the heat and leave to cool slightly. Using either an immersion blender, or blender, blend.. Pour it through a sieve into a clean pan, using a wooden spoon to push it through. Season to taste.
  5. To serve, stir in the crème fraîche. Pour into heated bowls and top with chives.

Apple parsnip soup


Roasted Cauliflower with “Wow This Sauce is So Good” Sauce

This has been one of my go-tos for a while after being taught it by a friend last year. It is really beautiful when brought to the table, and the sauce, if you couldn’t tell by the title, is one that will leave people talking.You’ll love having the induction stove top for the sauce because you need to watch it somewhat closely to keep it from burning and having better control over the heat than a gas stove top is really helpful.

Ingredients:
1 large cauliflower head, trimmed (Get as big and pretty of one as possible, fresh)
300ml dry white wine (pinot grigio preferred)
2 bay leaves
1 tbsp black peppercorns
Garlic bulb, halved horizontally (This is the whole bunch of garlic, not just a clove)
1 large egg, lightly beaten and seasoned well
Sharp cheese that you can sprinkle over the top (this is optional)

For the sauce:
Olive oil for frying
1 shallot, very finely chopped
50ml dry white wine (a pinot grigio works for this)
300g vintage or extra-mature cheddar, grated
125ml whipping cream (35% cream)
1 jalapeno, deseeded and finely chopped (I keep the seeds in because I like the spice)
2 green onions, finely sliced

  1. Preheat the oven to 425F.
  2. Put the cauliflower in a large pan with the 300ml wine, bay leaves, peppercorns and garlic halves. Pour over boiling water from the kettle to just cover the cauliflower – there’s no need to worry if your cauliflower floats, it likely will – and simmer for 20 minutes, turning it halfway through.
  3. Lift the cauliflower out of the poaching liquid into a colander and leave for 10 minutes to steam dry. (Be careful when lifting- it will be hot, and you don’t want to be rough with it, you want to keep its shape).
  4. Put the cauliflower in a roasting pan (anything that is deep enough), brush all over with the egg, then grate over a generous amount of cheese so it covers all of the top and on the sides.
  5. Roast in the top third of the oven for 15-20 minutes until golden (watch this closely after the 15 minute mark, it can go from perfect to burnt pretty quickly)
  6. To make the sauce, heat a splash of olive oil in a heavy-based saucepan (cast iron or nonstick is fine), add the shallot and cook for 5-6 minutes until translucent and soft.
  7. Add the 50ml wine and bring to a bubble (not a rapid boil) until evaporated by two thirds. Turn the heat down to its lowest setting, then add the cheese and cream. Stir constantly until the cheese melts to a smooth sauce. Stir through the chilli and spring onions, season, then pour into a warmed container. Put a piece of cling film directly onto the surface of the sauce and keep somewhere warm (I will put a stool in front of the oven and put it there so it gets the warmth off of the oven).
  8. When the cauliflower is roasted, remove from the oven and transfer to a serving platter. Take it to the table, then pour over two thirds of the sauce before carving. Serve the remaining sauce on the side.

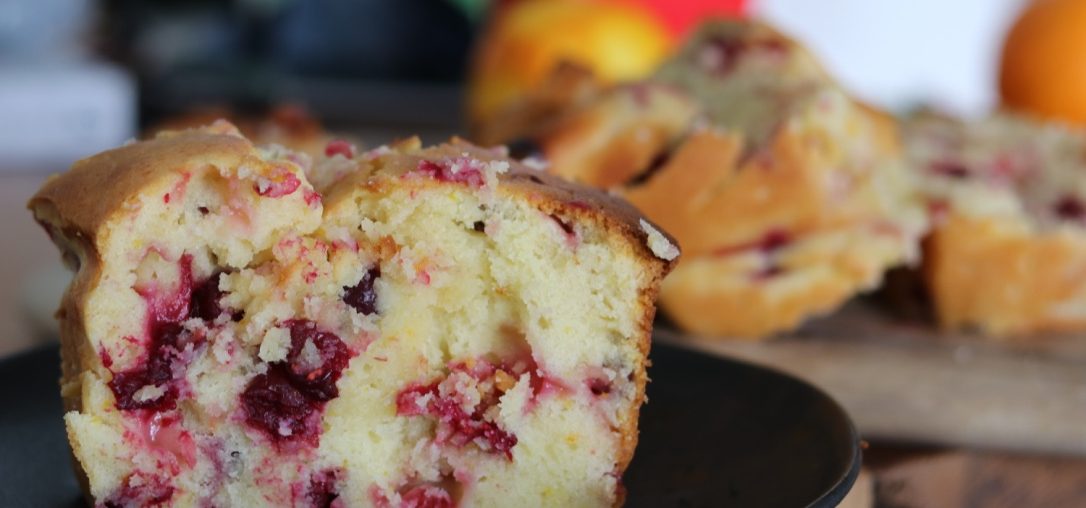
Orange Cranberry Loaf

I was taught how to make this by a friend of mine who recently launched a bakery, and I never would have thought to make it. When I did, it was strange, apparently it was a dessert that a lot of my friends families made for them growing up. It was great to be able to bring back those memories for them. This is a breeze to make, and lasts in the fridge for up to two days after.

Ingredients
2 cups all-purpose flour
1 1/2 teaspoons baking powder
1/2 teaspoon baking soda
1/2 teaspoon salt
1 tablespoon grated orange zest
1 1/2 cups fresh cranberries
1/4 cup butter, softened
1 cup white sugar
1 egg
3/4 cup orange juice

  1. Preheat the oven to 350 degrees F (175 degrees C). Grease and flour a 9×5 inch loaf pan. Whisk together flour, baking powder, baking soda, and salt. Stir in orange zest, and cranberries. Set aside.
  2. In a large bowl, cream together butter, sugar, and egg until smooth. Stir in orange juice. Beat in flour mixture until just moistened. Pour into prepared pan.
  3. Bake for 1 hour in the preheated oven, or until the bread springs back when lightly touched. Let stand 10 minutes, then turn out onto a wire rack to cool.

Orange cranberry loaf slice

This post was sponsored by Frigidaire Canada

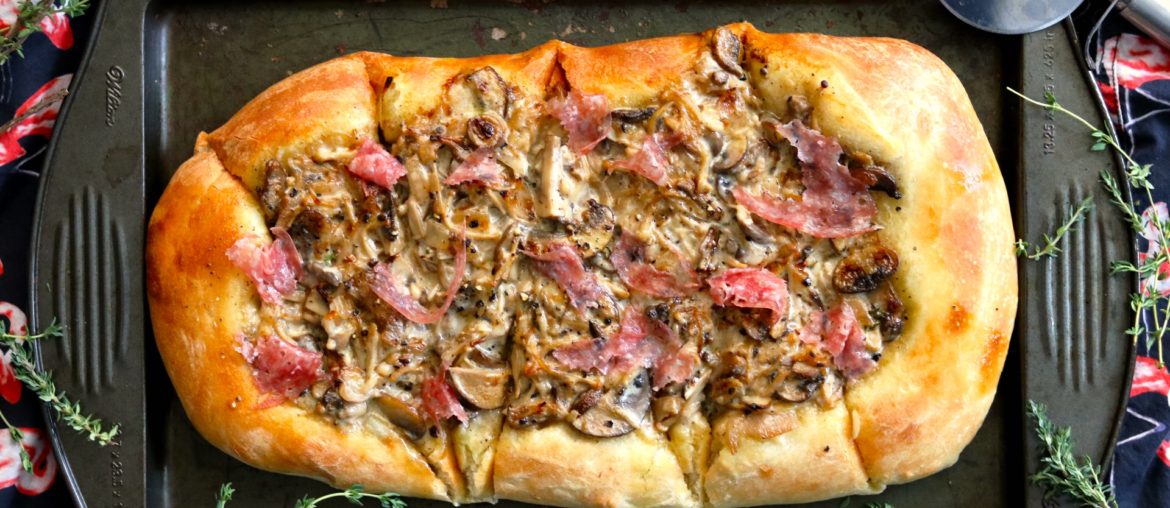
Creamy Mushroom and Prosciutto Pizza

I have always been a fan of “different” pizzas. When I would order from a pizza shop it would never be a regular “Normal cheese, normal sauce” kind of ordeal. It was always “Light cheese, extra sauce,  toppings, additional sauce on top” or “No cheese, thick sauce, toppings that will sit well in the sauce” order. It must have driven the local chain pizza store insane. (Before you start thinking my taste is awful, I do enjoy a great Italian pizza, and will never make substitutions to ones I order at restaurants. This is simply me being picky about the basically cardboard pizzas you order for $6.99 on a Wednesday night when it’s cold and you don’t want to go outside).

Because of this pickiness with my pizzas, it usually meant I don’t make them myself. Everyone has that one meal or item they don’t make because it’s not worth it to them. Some of my friends only buy their curry out because it’s too much effort at home. Some friends only buy the rotisserie chickens because it’s so much cheaper than buy a raw whole chicken and making it yourself. For me- it’s pizza. That was until I was inspired by the creamy mushroom pizza in Martha Stewart’s Appetizers book. I realized that making pizza didn’t have to be that hard (especially if you cheat like I did and buy ready made dough). I have made some changes to the original recipe, making it more to my liking. Let me know what you think!

Ingredients:

3Tbsp unsalted butter
1/3 cup finely chopped shallots
1 to 1-1/2lb mixed mushrooms (depending on how much mushrooms you want)
1/2 cup pinot grigio
3/4 cup heavy cream (35%)
Pizza dough (store bought)
2 Tbsp olive oil
3 Tbsp fresh tarragon leaves
Prosciutto (for serving)

Instructions:

  1. Preheat oven to 500F with rack in lowest position and a baking sheet (with rim) upside down in the oven.
  2. Melt butter in large pan over medium heat and add shallots cooking until they’re softened (about 3 minutes).
  3. Add mushrooms,salt, pepper, and cook for about 5 minutes or until softened.
  4. Add wine, bring to a boil and cook until evaporated. Add cream and cook until mostly absorbed (about 5 minutes)
  5. Stretch your dough into an oval (about 6″ wide by 18″ long) and place on parchment paper. Brush your dough with 1tbsp olive oil and add the mushroom mixture (leave about a 1/2″ border)
  6. Place your pizzas onto the baking sheet and bake until golden brown and crisp (about 12-14 minutes).
  7. Remove from oven, sprinkle with tarragon and prosciutto and serve!

I hope you enjoyed this- if you did take a picture of your creation and share it with me at @JackDHarding on Instagram!

Parsnip and Apple Soup

There is nothing better than when the summer finishes, the colder weather has started to roll in, and you know the holidays are on their way. For me it means more dinner parties, more chances to host, and more chances to make and share food with those around me. It’s the perfect opportunity to create moments, and make bonds that you wouldn’t otherwise make. So when I have guests coming over and I want something to warm them up right away, this is my go-to dish! It’s soothing and the you smell it as soon as you walk in the door.

This may seem like a lot of ingredients, but you’ll be surprised by what you already have. Most are pretty basic spices and the rest are things like an apple, some stock, and a cream. If you’re vegan or lactose intolerant, skip the cream- it won’t change the dish drastically.


Ingredients:
1 tsp cumin seeds
1 tsp coriander seeds
1/2 tsp green cardamom seeds (from 3-4 pods)
40g butter
2 1/2 tsp olive oil
2 medium onion, chopped
700g  parsnips
3 garlic clove, crushed
5 cm fresh ginger, finely grated
1 tsp ground turmeric
1 tsp garam masala
150g peeled and chopped Golden Delicious apple (about 1 medium-size apple)
1.2L fresh vegetable stock
2 tbsp crème fraîche
1 tsp chopped chives to garnish

  1. Heat a small, dry frying pan over a medium-high heat. Add the cumin, coriander and cardamom seeds and shake them around for a few seconds until they begin to get a bit darker (you’ll also smell them toasting). Put these into a mortar and pestle or a pepper grinder and turn them into a powder.
  2. Heat the butter and oil in a medium-size pan. Add the onion and cover. Cook for 10 minutes until soft and lightly golden. Meanwhile, peel the parsnips and cut them into 2.5cm pieces. (Peeling is important or your soup won’t have a nice consistency).
  3. Uncover the pan, add the garlic, grated ginger and all the spices, then cook for 1 minute more. Add the parsnips, chopped apple and stock, then bring to the boil, cover and simmer. Simmer for 45-60 minutes or until the parsnips are tender when you poke them with a knife.
  4. Remove soup from the heat and leave to cool slightly. Using either an immersion blender, or blender, blend.. Pour it through a sieve into a clean pan, using a wooden spoon to push it through. Season to taste.
  5. To serve, stir in the crème fraîche. Pour into heated bowls and top with chives.

I hope that you enjoy this, and if you did, feel free to tag me at @JackDHarding on Instagram and share your creation with me!

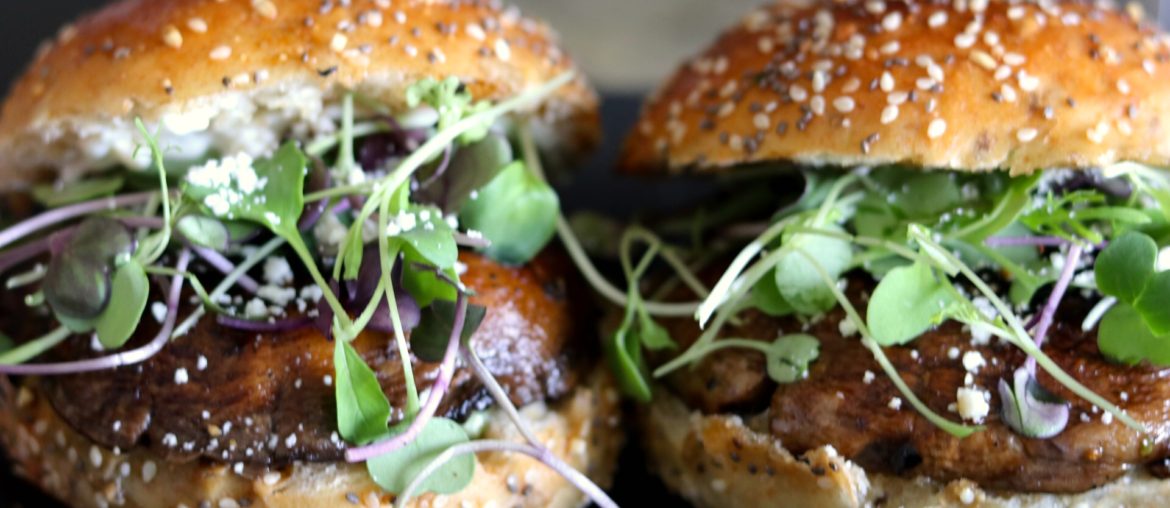
Grilled Portobello Burgers

As I’m sure anyone who has worked to maintain a healthy body, or working towards their ideal healthy self will know- it’s not easy. There are good weeks, and there are bad. There are times when it seems like months go by and you’re proud of all the good you’ve done for yourself. And then…. well, there are those weeks and weekends where everything you want, you have. It leaves you a little sluggish to say the least.

I had one of those weekends last weekend. I went to visit Detroit (I had never been!) and was happily surprised by the fact my hotel had  Burger King in it (there aren’t many in Toronto, and as I’m sure anyone who visits the US, or lives there and comes here knows- fast food is better in the US). A few Whoppers and very cheap chicken nuggets later and well… it was time to treat myself a little better.

I decided to start a week of clean eating, eating all vegetables and keeping meat out of the diet for 7 days. I’ll be sharing my other meatless recipes this week, but here was my first- Grilled Portobello Burgers.

Start off with fresh portobello mushrooms.

portobello mushrooms on cutting board

Combine olive oil and balsamic vinegar in a bowl, and dredge the mushrooms in the bowl (I found a smaller bowl worked because the cap was the perfect size to spin in size and get total coverage.

portobello mushrooms in olive oil and balsamic vinegar

Heat a grill to medium high, and put the mushrooms cap side down first to start, for about 10 minutes. Flip and grill for another 5-10 minutes or until soft.

portobello mushrooms grilling on grill

Once you remove them from the grill, set aside and start building your buns. I started with a sunflower seed pesto (recipe here).

sunflower seed pesto on toasted bun

Once that’s done, I added the mushroom, some micro-greens (I like pea shoots) and a touch of hot sauce.

Portobello mushroom on bun with greens

Finish by adding any of your favourite toppings and additions, and seal with the top bun! A delicious heart healthy treat. This will definitely help you on Meatless Mondays!

Portobello Burgers with greens on plate

Yellow Pukka Curry Recipe

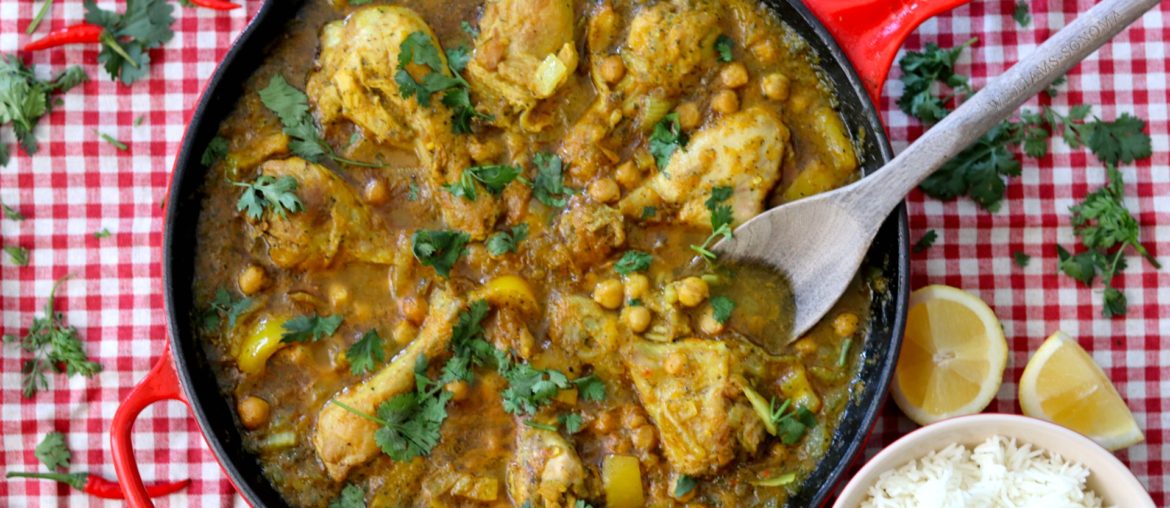
For whatever reason, curries were something I never attempted to make. Whether it because they’re a cheaper option when going out, or because I was a little intimidated by how much goes into them (probably this one) I never thought “Oh let me make curry for dinner.” That changed when I was trying to think of a nice dinner to make for a Sunday night, and went “I haven’t had curry in ages, why don’t I try it?” Now this recipe isn’t for the light of heart in that it takes a while to make, and if you’re not patient, it can be frustrating to make (there will be a lot of standing and mixing and stirring, and a fair bit of moving parts. That being said, this was a delightful recipe and made for a great dinner. (This recipe is an adaptation of Jamie Oliver’s Recipe found here). 

Ingredients

  • Two large yellow onions, chopped
  • 6 cloves of garlic
  • 10cm (about 3 inches) garlic chopped
  • 2 yellow peppers, chopped roughly
  • 1 Oxo Chicken stock cube
  • 3  red chilis
  • 1/2 bunch of coriander (more or less depending on how you like it)
  • 1 1/2 tsp liquid honey, warm
  • 1 heaping tsp turmeric
  • 2 heaping teaspoons curry powder
  • 8 chicken drum sticks (skin on or off, I prefer with no skin)
  • olive oil
  • 1 can of chickpeas (drained)
  • 1 heaping tsp of tomato paste
  • 3 cups basmati rice

Instructions

  1. Peel and chop the onions, garlic and ginger and remove the seeds from the peppers.
  2. Put 1 onion, 1  yellow pepper, the garlic and ginger into a food processor. Crumble in the stock cube and add the chilli (I keep the seeds to make it a bit hotter), the coriander, honey and spices. Now use the pulse setting on your processor until it resembles a paste (you’re going to be adding this to your chicken and adding water later, so don’t worry about it being really fine).
  3. Place a large cast iron skillet (30cm or larger) on medium-high heat and fry the chicken drumsticks (pull the skin off first if you’re like me, otherwise keep it on) with the olive oil for 10-15 minutes. It should be golden brown (and crispy if skin is on). Once cooked, remove and put aside. Keep the skillet on the heat.
  4. Chop up the other onion and pepper (I prefer the onion finely chopped, while keeping the pepper a bit bigger) and add to the pan to cook for a few minutes (about 4-5 minutes). Add the paste you made earlier, and cook for another 5 minutes.
  5. Add in 4 cups of boiling water (500ml). Now add the drained chickpeas and tomato paste, as well as some black pepper. You’re going to want to stir well, so everything gets mixed nicely.
  6. Add the chicken you removed back to the skillet. You likely won’t have a lid for the skillet, so use a piece of aluminum foil to cover. You’ll want to reduce heat and simmer for 45-50 minutes. The sauce should get thick and darker.
  7. When you only have 15-20 minutes left before the sauce is done, cook your rice (in 5 cups of boiling water). Cook for about 15 minutes (a little less if your rice absorbs quickly).
  8. Serve the curry in the skillet in the middle of your table, and place over the rice on your plate!

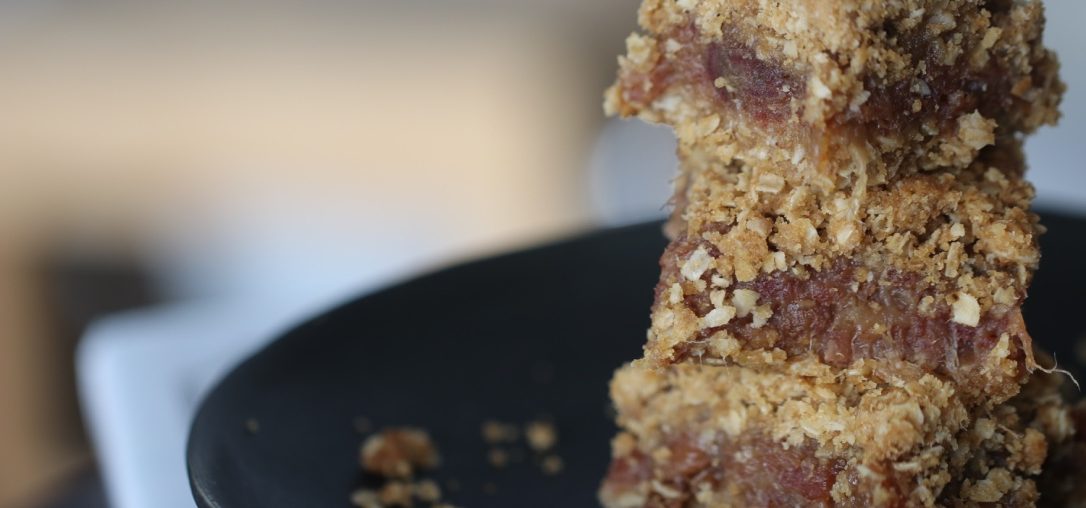
Date Square Recipe

Ingredients:

1 1/2 cups rolled oats
1 1/2 cups sifted pastry flour
1/4 teaspoon salt
3/4 teaspoon baking soda
1 cup packed brown sugar
3/4 cup butter, softened
3/4 pound pitted dates, diced
1 cup water
1/3 cup packed brown sugar
1 teaspoon lemon juice


  1. Preheat oven to 350 degrees F (175 degrees C).
  2. In a large bowl, combine oats, pastry flour, salt, 1 cup brown sugar, and baking soda. Mix in the butter until crumbly. Press half of the mixture into the bottom of a 9 inch square baking pan.
  3. In a small saucepan over medium heat, combine the dates, water, and 1/3 cup brown sugar. Bring to a boil, and cook until thickened. Stir in lemon juice, and remove from heat. Spread the filling over the base, and pat the remaining crumb mixture on top.
  4. Bake for 20 to 25 minutes in preheated oven, or until top is lightly toasted. Cool before cutting into squares.

Orange Cranberry Loaf Recipe

Ingredients:

2 cups all-purpose flour
1 1/2 teaspoons baking powder
1/2 teaspoon baking soda
1/2 teaspoon salt
1 tablespoon grated orange zest
1 1/2 cups fresh cranberries
1/4 cup butter, softened
1 cup white sugar
1 egg
3/4 cup orange juice

  1. Preheat the oven to 350 degrees F (175 degrees C). Grease and flour a 9×5 inch loaf pan. Whisk together flour, baking powder, baking soda, and salt. Stir in orange zest, and cranberries. Set aside.
  2. In a large bowl, cream together butter, sugar, and egg until smooth. Stir in orange juice. Beat in flour mixture until just moistened. Pour into prepared pan.
  3. Bake for 1 hour in the preheated oven, or until the bread springs back when lightly touched. Let stand 10 minutes, then turn out onto a wire rack to cool. Wrap in plastic when completely cool.

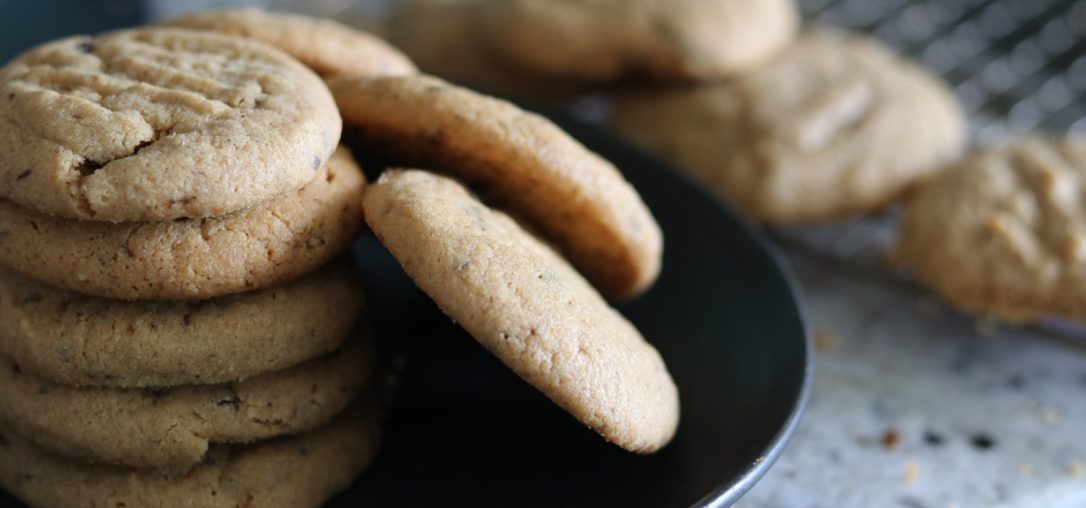
Recipe: Gluten Free Peanut Butter Cookies

Ingredients:
1 cup peanut butter
1 cup sugar
1 egg, beaten
1 tsp baking soda

Directions

  1. Preheat oven to 350F and grease cookie sheets.
  2. Beat together peanut butter and sugar in a large bowl with an electric mixer until smooth.
  3. Add beaten egg and baking soda to peanut butter mixture and beat until well combined.
  4. Roll 1 teaspoon of dough into a ball and place on cookie sheet.
  5. Place dough balls one inch apart on cookie sheet and flatten with fork making a cross pattern.
  6. Bake until puffed and a golden pale, about 10 minutes.
  7. Cool cookies on baking sheet about 2 minutes and then transfer with spatula to rack to cool.
  8. May be kept in airtight container at room temperature for 5 days.
  9. Makes about 2 dozen cookies.