Tag

home cooking

Browsing

How to Make a Healthier Chicken Pot Pie

This post has been sponsored by Loblaws. Although they have provided me with financial compensation and products, my opinions and words are all my own. I am in partnership with Loblaws and will be bringing blog posts and recipes throughout the rest of the year, and all partnered posts will be marked as sponsored.

It’s officially fall, which means it is my favourite time of year! I love this time of year because the weather is getting cooler, you can start bringing the sweaters and coats out of the closet, and the food gets to be warm and hearty! As a kid, I always enjoyed this time of year because even though it meant it was back to school time, it also meant that my mom was going to start having delicious dinners ready for when my brother and I were back from school.

There is nothing better than coming back home and knowing that there was going to be a hearty dinner waiting for you after a long day. It was during those years that I was introduced to some of my favourite foods, including some that I still call my favourites to this day. We would have tourtière (a French-Canadian dish), scalloped potatoes, lasagnas, homemade fries and chicken nuggets (which are SO much better when homemade). 

As you can imagine, as I got older and started to try cooking for myself, I looked back at these dishes as starting points for inspiration and wanted to learn how to make them myself. Some of the easier things like homemade fries and chicken nuggets were first, and things like scalloped potatoes and tourtière were near last (as they were much more advanced). 

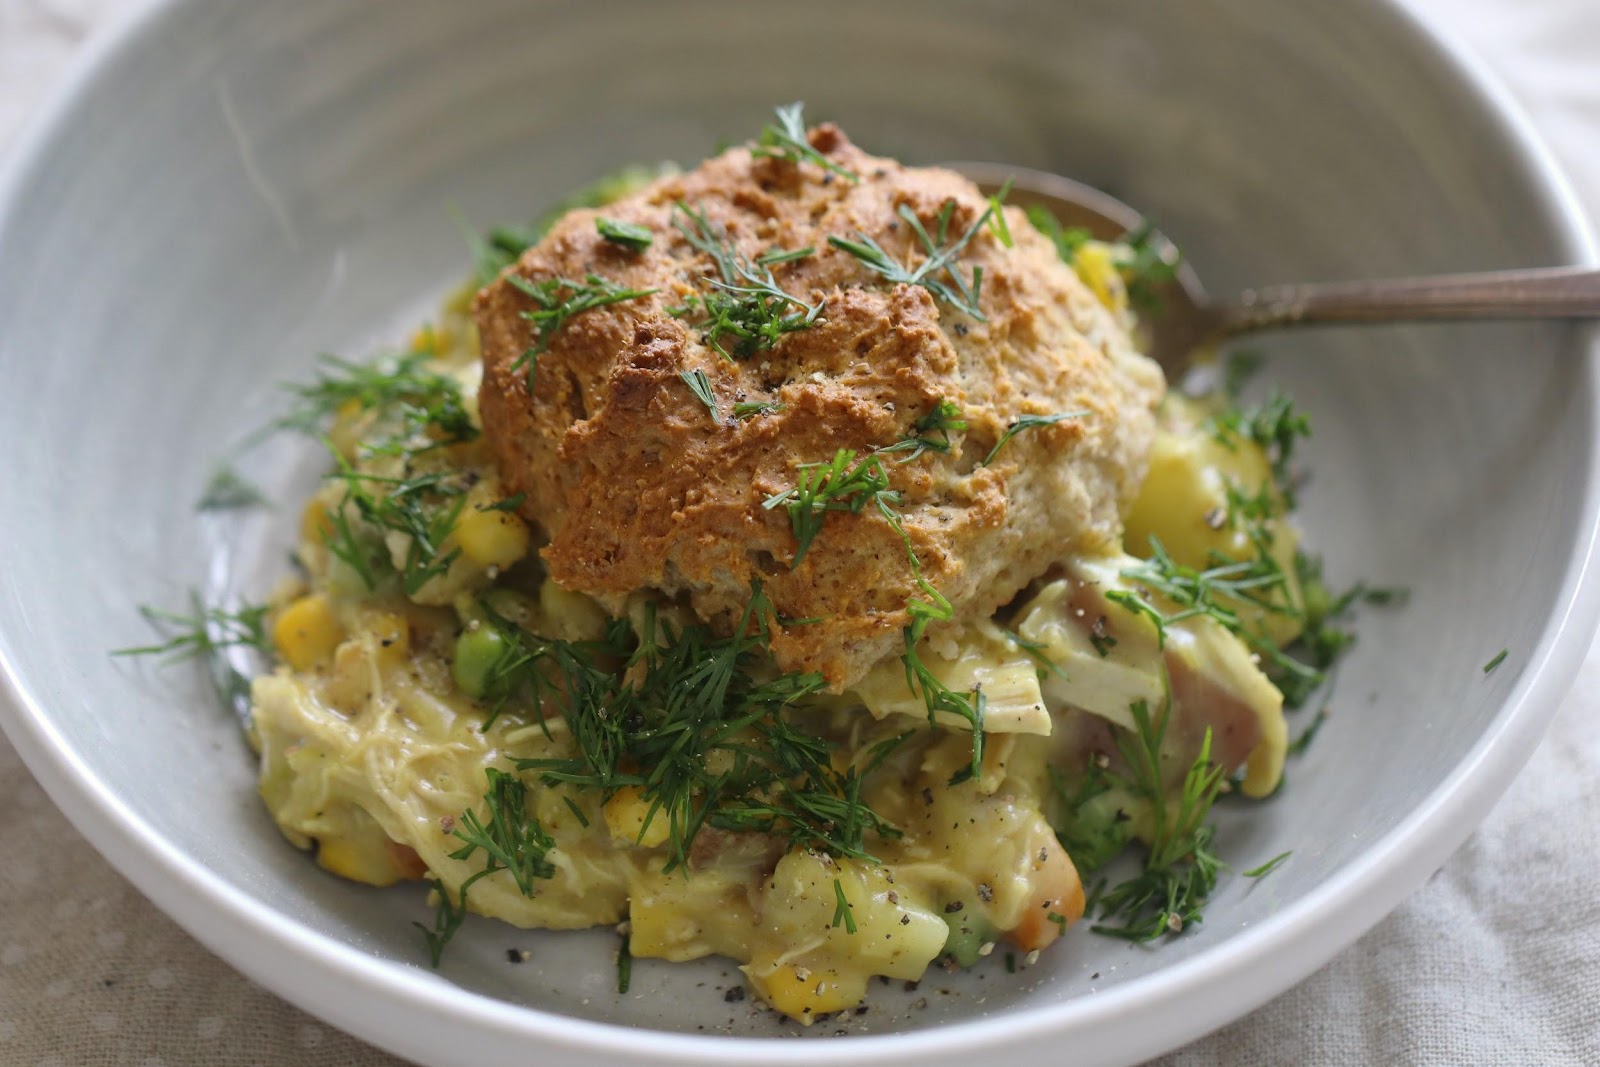
One of my all-time favourites that my mom used to make for us, though was chicken pot pie. To me, it was one of the perfect dinners. It was rich and creamy, had a great mix of textures (between the veggies, the creamy base, and the chicken, you had a delicious feeling in your mouth), and let’s not forget about the crust- light and flaky! 

This month as part of the #FoodLoversUnite campaign, I got to work with Karley, the in-store registered dietitian at the Maple Leaf Gardens location (if you remember, I met with her before to find ways to incorporate more plant-based protein into my diet) to find ways to take my favourite chicken pot pie and find ways to make it more health-conscious without losing any of my favourites parts! Loblaws has a network of over 70 dietitians across Canada to help you achieve your health and wellness goals in a way that works best for you and your body. Through personalized consultations and store tours, the in-store dietitians help customers reach and maintain their healthy weight and manage their digestive concerns. To learn more or book an appointment, visit bookadietitian.ca

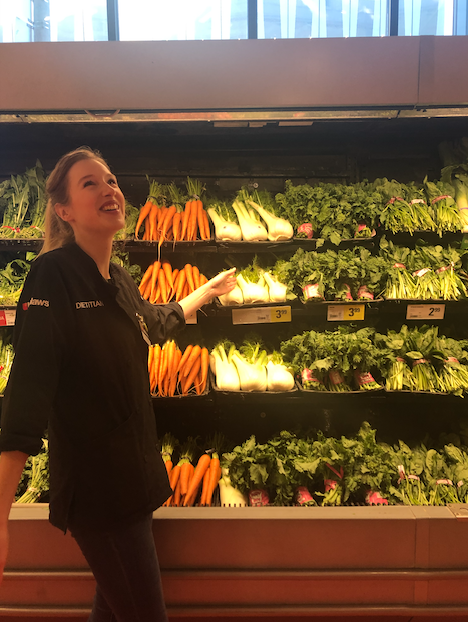
Karley walked me through how I could make some small changes to this lifetime favourite and make it something that can still be just as delicious while focusing on it being nutritious and packed with ingredients that will help better fuel my body! She showed me some more common-sense substitutions like 2% milk instead of whipping cream, but also introduced some ideas I hadn’t thought of before like including cauliflower rice, reducing overall sodium content, and how to better the overall nutritional profile of the dish. Even though I consider myself fairly well educated when it comes to making healthier choices for meals, it was fantastic to trade ideas back and forth with Karley and work to introduce new ways of thinking into how I approach meals and recipe development. I highly suggest utilizing the Loblaws in-store dietitian services if you’re interested, I guarantee you’ll be surprised with how valuable they are.

I won’t make you wait any longer, here is my recipe for my health-conscious chicken pot pie! 

Ingredients:

2.5lbs cooked chicken breasts, cooked and shredded (about 4 large chicken breasts)

2 cups diced potatoes with skin-on (yellow or red)

2 tsp minced garlic 

1 tsp garlic powder

¼ cup diced white onion 

¼ cup chopped green onion 

3 carrots, diced 

1 leek, finely chopped 

½ cup fresh peas 

½ cup fresh corn 

1 tsp salt

1 tsp black pepper 

Sauce:

2 cups low sodium chicken broth
11/2 cups 2% milk 

¾ cup all-purpose flour 

1 tsp garlic powder 

½ tsp salt 

½ tsp white pepper

Biscuit Crust:

½ cup whole wheat flour 

½ cup all-purpose flour 

1 ½ tsp baking powder

½ tsp baking soda

1 Tbsp sugar 

½ tsp salt 

1.5 tbsp cold butter 

½ cup 0% MF Plain Greek Yogurt 

¼ cup 2% milk

1 large egg

Instructions: 

Start by making the sauce:

  • In a small bowl whisk the garlic powder, salt, white pepper and flour
  • Pour in the milk and whisk to combine
  • In a large pot, bring the chicken broth to a boil and stir in the milk and dry ingredient mixture to the boiling water and cook over medium heat until the mixture is thick. Remove from heat.

Then make the filling: 

  • Preheat oven to 375F
  • Grease a cast-iron skillet and set aside
  • In a medium-sized pan, sauté the potatoes and garlic for 10 minutes or until brown. Add the onion, carrots, leeks and garlic powder and cook until soft (10 minutes or so).
  • Add the peas, corn and chicken and stir to combine, add salt and pepper.
  • Pour in the sauce and stir to combine. Add the sauce and ingredient mixture into the cast-iron skillet and set aside.

Then make the topping:

  • In a large bowl combine the flours, baking soda and powder, sugar and salt and whisk to combine.
  • Cut the butter into smaller pieces and add them to the dry ingredients, using a pastry blender to combine until you have coarse crumbs.
  • Add the yogurt, milk and egg and combine.

Now combine:

  • Divide the batter into biscuit sized pieces and place on top of the pre-made potpie mixture in the cast iron. 

Cook on the middle rack of the oven for 35 minutes or until mixture is bubbly and biscuits are golden brown. Let cool for 10 minutes before serving.

If you want to make this and have any questions, feel free to DM me @JackDHarding on Instagram, and if you make it, please tag me and show me your creation. 

How to Make Crispy Buttermilk Fried Chicken

Fried chicken has to be one of the best comfort foods. It’s warm, it’s salty, it is a punch of flavour and a warmth that makes you feel fantastic (at least until you come down off of the fried chicken-high).

My childhood memories of fried chicken were exclusively chicken you would get from a fast-food restaurant. My parents didn’t have a deep frier and frying wasn’t something that my mom ever want to do (and in fairness, as someone who now has to clean his own kitchen, I can understand why). So as you can imagine, until I was probably 20 my idea of fried chicken was limited to KFC and McDonalds Chicken Nuggets. So as you can imagine when I first had fried chicken that wasn’t from a box or a chain, I thought all of it was AMAZING. It took me a while before I knew what I felt what “good” or even “great” fried chicken is.

While there are plenty of types of fried chicken (did you know Country Fried, Korean, Nashville and other types all have their own methods, techniques and flavours?) I’m quite preferable to buttermilk fried chicken when I’m making it myself. That’s what brings us to this recipe. I’ll be honest, this doesn’t come together in 5 minutes and will require some planning. It is going to sit for at least 6 hours, so I suggest planning this out and prepping in the morning before work and coming home and frying it up.

Ingredients:
8 Chicken Drumsticks
11/4 Tsp Ground White Pepper
1/4 Tsp Ground Black Pepper
11/4 Tsp Sea Salt ( I typically use an Herbed Salt like an Herbes De Provence Salt)
11/4 Tsp Smoked Paprika
1/2 Tsp Dried Rosemary
1/2 Tsp Cayenne Pepper
1/2 Tsp Garlic Powder
1/4 Tsp Dried Thyme
1/4 Tsp Dried Oregano
21/4 Cups Buttermilk

Flour Blend:
21/4 Cup All-Purpose Flour
1 Tsp Kosher Salt
3/4 Tsp Paprika
3/4 Tsp Garlic Powder
1/2 Tsp Cayenne Pepper
1/2 Tsp Dried Aleppo Pepper (or chilli powder)
1/2 Tsp Fresh Cracked Ground Pepper
2L Vegetable Oil for frying

Instructions:
In a large bowl, toss chicken with both peppers and salt, as well as all spices up until the buttermilk and mix to combine and coat well. Add buttermilk and stir well to properly combine. Cover tightly with plastic wrap and let sit in the fridge for 6-8 hours.
Once the chicken has sat for 6-8 hours combine all the ingredients in the flour blend (except the oil) and whisk until thoroughly combined. Place in a shallow dish (a baking sheet with a rim works nicely).
Remove the chicken from the buttermilk and dredge in the flour mix, tapping off any excess and place on a dry plate.
Using a fry thermometer, heat the oil in a heavy-bottomed pot or dutch oven to 350F.
Adding the chicken 4 drumsticks at a time (max), cook for 10-15 minutes, ensuring they don’t touch. Use tongs to flip them 1-2x throughout frying. Repeat until all 8 drumsticks are cooked.

Please note: This recipe can be easily doubled. When substituting drumsticks for thighs or wings, adjust cook time accordingly.

I hope you enjoy this recipe and try and make it yourself. If you make this or have any questions, feel free to DM or tag me @JackDHarding on Instagram!


How to Make Homemade Corndogs

I love how when you ask people about some of their favourite memories, they often revolve around food. Whether it is dinners with their families, dishes they used to cook in the kitchen with someone, or even stories about travel and adventure which ultimately always end up in a story about where they ended up eating.

Food is also great at making people reminisce. Something as simple as a taste or a smell can bring you back to a special place in time. Next time you’re chatting with someone you don’t know that well, ask them about some of their favourite foods- I guarantee it will not only help you get to know them better, but it will help you connect with them in a much more meaningful way.

I have many of these memories from my childhood- and one in specific revolves around the recipe I’m sharing with you today. Every year until I moved out practically my family and I would go to the CNE (Canadian National Exhibition) together. We didn’t have too many traditions as a family, but this was always one of them.

What became one of the things I would look forward to was getting a Coke in a collectors cup (they would have exclusive reusable cups often in weird shapes or with fun straws) and getting a corndog! There were plenty of vendors that sold corndogs around the fairgrounds, but there was one that made them the best (in my opinion). They were the best mix of sweet, savoury, with just a bit of heat. They came in two sizes, regular (normal hotdog) and jumbo (a footlong hotdog). The batter was a great thickness, balancing out the thick juicy hotdog that was inside.

Remembering that corndog the other day, and having just picked up more cornmeal, I thought, “Why not corndogs?” So I started my corndog creation journey. This took me a few tries to get to where I loved it and I am happy I kept trying because these are a real crowd pleaser now! In fact, I’m making them for my parents next weekend for my birthday.

Make sure to let these cool a bit before eating. They won’t be too hot to eat, but I find the flavour comes out best once they’ve had a chance to sit.

Ingredients:

10 Regular Hotdogs, or 6-8 Jumbo dogs

1 1/4 Cup All Purpose Flour

1 Cup Cornmeal

3 1/2 Tbsp Granulated Sugar

1 1/4 Tsp Kosher Salt

1/2 Tsp Baking Soda

1/2 Tsp Ground Black Pepper

1/2 Tsp Cayenne Pepper

1/4 Tsp Smoked Paprika

1 Cup Buttermilk

2 Extra Large Eggs

Vegetable Oil for frying

Instructions:

Using a paper towel, ensure the hotdogs are completely dry and then skewer with wooden sticks. Set aside.

In a large bowl, combine flour, cornmeal, sugar, salt, baking soda, black and cayenne pepper, and paprika. Whisk together.

In a smaller bowl, whisk together the buttermilk and egg until smooth and then pour into the bowl with the dry ingredients. Mix ingredients until just mixed. Let sit.

In a deep dish pot filled halfway up (3-4″) with oil, heat on medium until temperature reaches 375.

Dip the hotdogs into the batter and coat evenly. (Pro tip: coat my hands with flour and grab the hotdog first. The flour helps the batter stick). Ensure there are no holes in the batter. Add the coated hotdogs to the oil in batches of 3. Cook until golden brown (about 3-5 minutes).

Remove hotdogs from oil with tongs and let dry on paper towel. Sprinkle with flaky sea salt as soon as removed from oil.

Repeat this process until the oil gets back to 375F each time.

Serve with mustard or ketchup. Fresh dill goes very well with this batter too!

I hope you love these! I know I sure did. If you make them, tag me on Instagram at @JackDHarding

How to Make Healthy Chocolate Peanut Butter Cups

It is funny how we make friends as adults.

As someone who didn’t make my friends as a kid, almost all of my relationships and friendships have happened as an adult. While I sometimes feel like I missed out on having those people around me that I’ve known since I was 3 years old, or those people that I went to every level of school with, I feel really happy and blessed that I’ve been able to build a group of people around me who I not only feel like I chose to have there, but have also chosen to have me be a part of their lives.

One of those people is my friend Liz. I met Liz about six years ago at my first apartment in Toronto. I moved to midtown Toronto after living in a more suburban part of the city with my parents. I had a fantastic apartment which I likely would have still been in today had I not wanted to live alone (ah, roommates, right)? Liz and I didn’t meet through friends or even at a party, we met at her work! I needed a new hair salon and a place down the street from my office and my apartment were taking clients. I walked in and was paired with Liz. A few haircuts later and we were talking all the time. We went from just seeing each other once every few weeks, to her coming over, hanging out, and on numerous occasions, bleaching and dying my hair on my bed using a grocery bag as a cap (glamorous, I know).

Anyways, fast forward a fair bit into the future and Liz and I are still great friends. Although we don’t see each other every week, when we do catch up, we laugh until we can’t breathe and it feels like we haven’t missed a beat.

This week she came over in the evening and we planned to bake. Knowing that she tries to eat Keto, I wanted something she could enjoy- so we settled on these peanut butter cups! They are dark chocolate, all-natural peanut butter, and we used coconut flour and coconut sugar so they’re gluten-free and nearly sugar-free. These don’t really require any prep time, just require a bit of time to free in between steps. You can whip these up with barely any notice and they’re a crowd-pleaser.

Ingredients:

1 2/3 Cups All Natural Peanut Butter, melted (plus more for drizzling)

1 1/4 Cup Coconut Flour

1/3 Cup Coconut Sugar (or Erythritol)

1 1/4 Tsp Madagascar Vanilla Extract

1/4 Tsp Kosher Salt

2 1/4 Cup Dark Chocolate, melted

1 Tbsp + 1/2 Tsp Coconut Oil

Instructions:

In a large bowl, combine the peanut butter, coconut flour, sugar, vanilla and salt. Mix well until everything is smooth.

Roll the peanut butter mixture into balls roughly 1 Tbsp in size. Flatten slightly and place onto a parchment lined baking sheet. Freeze for 30 minutes or until firm.

Once the mix is nearly frozen, melt the coconut oil and chocolate together in a microwave in 20 second bursts on high. Stir in between bursts in the microwave.

Remove the frozen peanut butter mix and using a fork, dip each disk into the melted chocolate until coated and place back onto the parchment paper. Put disks back into the freezer and let firm for another 30 minutes.

Melt some additional peanut butter. Remove the disks from the freezer and drizzle with the melted peanut butter. Salt with flaky sea salt and freeze again for 10 minutes.

Serve these cold to best enjoy them.

I hope you enjoy these as much as we did, and if you make them, please tag me on Instagram at @JackDHarding

Sprinkle Donut Holes

If you’re an American friend, the term “TimBit” isn’t going to mean much to you which is why this recipe was called “Sprinkle Donut Holes” instead of what any Canadian would call it “Sprinkle Timbits.” If you grew up in Canada you’ll know that the term donut hole never caught on because the chain Tim Hortons sold “TimBits” (their version and branded with their name) and heavily marketed them for years. Now you can tell a Canadian traveller quite easy when they step into a bakery and ask for one. I’m really excited to have created a great recipe for these that not only fries well, but has a great mouth feel and are delicious! I guarantee that you’re going to love these!

Ingredients:

Donuts:
2 Cups All Purpose Flour
3 Tbsp Brown Sugar
1 1/2 Tbsp Baking Powder
1 Cup Milk
1 Large Egg
1 Tsp Pure Vanilla Extract
1/4 Cup Salted Butter, melted
1/3 Cup Sprinkles

Glaze: 
2 Cups Powdered Sugar
1/3 Cup Milk
1/2 Cup Sprinkles (for coating)

Instructions:

  1. Whisk flour, brown sugar, baking powder, and 3/4 teaspoon salt together in a large bowl, make sure it’s well mixed.
  2. Combine the milk, egg and vanilla extract in a smaller bowl and add into the flour mix. Add in the melted butter and the sprinkles and mix until a dough starts to form.
  3. In a large heavy bottom pot, heat at least 2″ of vegetable oil to 350F. Aside, line a wire rack with paper towel.
  4. Using an two spoons, spoon the dough into the hot oil. Fry until they’re golden brown (about 1-2 minutes per side) depending on how quickly your oil starts to cool. Using a slotted spoon, transfer to the rack andlet cool. 
  5. Once the donuts have cooked and are cooling: whisk powdered sugar, sprinkles, lemon juice, milk, vanilla extract, and salt together in a bowl to make the glaze. It should be smooth.
  6. Place a wire rack on a baking sheet. Dip each donut hole (one at a time) into the glaze and place on the rack; allow excess glaze to drip off before serving. (I add some extra sprinkles while they’re drying, but this is totally up to you).

Easy to Make: Salted Caramel Chocolate Cups

This is going to become a new household favourite for you once you’ve had it. It definitely has for me! These are not only easy to make, but they’re really easy to eat (hah). I was excited to make use of the Sea Salt Flakes I got at an event celebrating Windsor Salt’s 125 Year Anniversary! 

On August 16th, Windsor Salt hosted Table for 125, an exclusive culinary celebration with Canada’s cultural and community leaders, held around a single communal table. Hosted by celebrity chef Eden Grinshpan, more than 125 guests shared an inspired, curated meal featuring signature dishes created by Grinshpan to celebrate all Canadians who bring joy and positive change to their local communities. At the event, Windsor Salt also honored their first-ever Joy Squad, a group of ten local heroes and role models who are making a difference in their communities.

Ingredients:

  • 4 1/2 cups semi sweet chocolate chips
  • 2 1/2 cups caramels, chopped, unwrapped
  • 3 1/2 tablespoons milk 
  • Course Salt/Flake Salt

Instructions:

  1. Place cupcake wrappers in muffin tins (these are going to be big cups, not small like a traditional chocolate cup (think Reese’s)).
  2. In a large microwave safe bowl, add your chocolate chips and microwave at full power in 30-second intervals, stirring between blasts until smooth.
  3. Scoop an ice cream scoop worth of chocolate (~2tbsp) into each liner. You want to make sure about 1/4-3/8 of the chocolate is left for the top. Use a brush (pastry brush is best) to then spread and brush the chocolate up to the top of the liners. This will be a bit tricky so be patient. Place in freezer.
  4. In a medium sized microwave safe bowl, combine the caramels and milk and microwave on high for 120 seconds. Stir. Blast at 30 second intervals after that stirring each time until smooth.
  5. Remove muffin tin from freezer. Pour caramel into chocolate cups until about 2/3 full. Return to the freezer for 10 minutes.
  6. Remove muffin tin from freezer and use the pastry brush to brush the remaining melted chocolate over the top of the caramel being sure to cover all of the caramel (you don’t want any gaps). Sprinkle the salt on each cup and freeze for about 20 minutes.
  7. Remove muffin tin from freezer and peel away the cupcake wrappers from the chocolate cups (don’t put too much pressure on the cup- you don’t want to break them). Store in an airtight container or in the fridge for up to a week.

Let me know if you make these and if you do, tag me @JackDHarding and let me know if you made any changes.

Sweet Potato Pie with Quinoa Crust

I LOVED pumpkin pie when I was younger. The spices, the consistency, the crust, it was everything for me! As I’ve grown older it’s taken me quite some time to find that perfect flavour and I never would have thought it wouldn’t have had pumpkin at all. This sweet potato pie checks a number of boxes for me, gluten free, vegan, and nut free! 

Ingredients

1 1/2 cups Organic White Royal Quinoa, cooked and cooled to room temperature
1⁄2 cup Brown Rice Flour
2 heaping tablespoons Ground Flax
4 tablespoons Vegan Butter, room temperature
4 tablespoons Maple Syrup
3 1/2 cups Sweet Potato (approx 2 medium sweet potatoes)
3/4 cup Vanilla Soy Milk
3⁄4 cup Cane Sugar
1 1/4 teaspoon Cinnamon
1⁄4 teaspoon Ground Cloves
1⁄4 teaspoon Ground Ginger
Flax Eggs (2 Tbsp ground flax + 6 Tbsp warm water)

Instructions

  1. Preheat the oven to 400F (do this well before you plan on baking to ensure a consistent heat).
  2. In a large bowl, stir together quinoa, brown rice flour, flax and maple syrup.
  3. Using a fork, fold in the butter and combine evenly.
  4. Then, use a fork to fold in the room-temperature butter. Be sure to combine evenly.
  5. Grease a pie plate with coconut oil or cooking spray and press the quinoa mixture into the plate to form the crust.
  6. Bake the empty crust for 10 minutes.
  7. Peel, chop and boil the sweet potatoes to soften them for about 20-25 minutes.
  8. Drain the water from the potatoes and put the softened potatoes into a medium mixing bowl.
  9. Add the soy milk and use an immersion blender to make smooth and then add in the remaining ingredients.
  10. Pour the mixture into the pre-baked crust- do not overfill, the filling will rise when baking but set when it is nearly done.
  11. Bake for 60-70 minutes or until a toothpick comes out clean from the centre.

Note: Keep an eye on the crust while baking, if it starts to brown too quickly, add aluminum foil around the edges to keep it from burning.

Let me know if you make this and make sure to tag me @JackDHarding if you do!

How to Make Homemade Biscuits

There is something really fulfilling about making your own bread. Watching your creation go from a bunch of flour and sugar and salt to rising in the oven, and finally something delightfully warm and delicious you can have for breakfast, lunch or dinner is amazing.  However, the thought of spending a day of your time to *hopefully* have a loaf of bread turn out is something most people aren’t ready for (I mean, honestly, I’m not ready for that most of the time and I LOVE baking).

So what’s the next best thing? Homemade biscuits! No yeast needed, simple and easy to make, and devour-able for a few days with jams, jellies and spreads.

Ingredients:
3 cups All Purpose Flour
1 teaspoon salt
1 tablespoon baking powder
1 tablespoon sugar
6 tablespoons butter, at room temperature
1  cups cold milk (plus up to 3 Tbsp) (whole milk while make your biscuits more tender, I made mine with skim milk which made them  a bit more dense)

Instructions:

  1. Preheat your oven to 425°F with a rack in the upper portion. Get out a baking sheet and line with parchment paper.
  2. Measure your flour by adding it spoonful by spoonful into a measuring cup and adding to a large bowl.
  3. Mix together the flour, salt, baking powder, and sugar.
  4. Add the butter to the flour mixture using a food processor (you can use a fork or pastry blender as well, but I find the even consistency from the food processor is best) until has a bread crumb like consistency.
  5. Start to add the milk, table spoon by table spoon, over the flour mixture. You’ll want to do this quickly for about 10-15 seconds until a dough has formed. If the texture is dry and won’t come together, keep working it (and add up to the other 2 Tbsp of milk if it needs it to be cohesive).
  6. Place the dough on a lightly floured work surface. Pat it into a rough rectangle about 3/4″ thick. Fold it into thirds like a letter and roll gently with a floured rolling pin until the dough is 3/4″ thick again.
  7. Using a biscuit cutter, or the rim of a glass, cut the dough into circles (I like round biscuits) or if you’re scared of waste, cut the dough into squares with a sharp knife.
  8. Place the biscuits with the bottom side up onto the baking sheet and brush them with a bit of milk to help them brown nicely in the oven.
  9. Bake for 15-20 minutes (keep an eye out, they’ll go from lightly browned to burnt fairly quickly).
  10. These will keep for 2-3 days if wrapped and stored at room temperature. You can also freeze for longer periods of time.
  11. Bake the biscuits for 15 to 20 minutes, until they’re lightly browned. Remove them from the oven, and serve warm.

I hope you enjoy these! If you decide to make them, feel free to tag me at @JackDHarding and let me know how they turned out!

The Ultimate Summer Party Menu

I love to host parties- there’s something really satisfying about hosting a good get together at my home. Whether it be a birthday party (mine or otherwise) a New Year’s Eve bash, or something as simple as a dinner on a weeknight with friends. Having my place be the gathering place has always been important to me. It’s why I’ve always made sure to be prepared for a guest or two to stop over, and more importantly, it’s made me know how to put together a menu for when I’ve invited people over.

This week I had a few friends over to celebrate the beautiful weather and more importantly- just get together! Knowing I wanted to put together a menu that would be tasty, would sit out well, and would be fairly easy to make (who wants to be slaving in the kitchen while you’ve got people over, right)? What made this fun was I got to work with Woolwich Dairy to help put together this summer feast and share my menu for the Ultimate Summer Party.

Here is the menu I put together and the food I served on the day:

Appetizer: Oven Roasted Corn with Chilli Lime Butter and Woolwich Dairy Chevrai Soft Unripened Goat Cheese Crumbles
Main: Hot Italian Sausages with Woolwich Dairy Chevrai Soft Unripened Goat Cheese Crumbles, Pickled Hot Peppers and Fresh Greens
Dessert: Woolwich Dairy Triple Creme Goat Brie and Cranberry Jelly Pops

Now before I start listing the ways to make these, you may be wondering- why only goat cheeses? I, along with many of my friends, are becoming increasingly picky about what we want to put in our bodies. It is important that we not only know where our food is coming from, but that we’re making the best choices to help fuel our body and keep us healthy. I personally prefer Goat Cheese for a lot of my meals using cheese because it has less naturally occurring sugars and contains more potassium, calcium, magnesium, Vitamin B6, Vitamin C and Iron. It’s also higher in protein and most importantly, has lower lactose levels than normal milk. That last one is a big deal for me- I’m very sensitive to lactose, and whereas I may not feel as great after eating traditional dairy products, I don’t notice the same feeling after goat milk products! Always an added bonus! Now, onto the menu!

Oven Roasted Corn with Chilli Lime Butter and Woolwich Dairy Chevrai Soft Unripened Goat Cheese Crumbles

Corn on cutting board

Nothing says summer better than corn on the cob! Super sweet, can be dressed savoury and always a crowd favourite. This is a go-to recipe of mine and I make it every year. I play around with the amount of spices and seasonings (it’s not an exact science to say the least). So have fun with these and see what works for you!

Ingredients: 

Ingredients: 

Heat a grill to medium-high heat. Grill the corn in their husks until the husks start to blacken, about 3 minutes per side. (If you don’t have a grill, or you bought your corn without husks, you can simply bake these on a roasting pan for about 20 minutes at 400F.

Mix together the butter, chilli powder, cayenne pepper, lime juice and some salt and black pepper in a bowl until incorporated.

Peel back the corn husks or remove entirely. (If pre-husked, ignore)

Rub the chilli-lime butter all over the corn. Garnish with the goat cheese.

Hot Italian Sausages with Woolwich Dairy Chevrai Soft Unripened Goat Cheese Crumbles, Pickled Hot Peppers and Fresh Greens

Ingredients:

To serve: ketchup, mustard, relish, etc…

Instructions

Cook your sausages according to the instruction when you buy (typically around 350F for 25-30 minutes).

While your sausages are cooking, on a grill or grill pan, heat to hot, and place your buns inside faced down until lightly toasted.

Once your buns are toasted, prep your condiments (cut olives in half, put everything into bowls, etc..)

Once the sausages are cooking, start with a bed of greens in your buns, top with the sausage, and add your condiments, finishing with the goat cheese.

Woolwich Dairy Triple Creme Goat Brie and Cranberry Jelly Pops

Ingredients:

Instructions:

Preheat oven to 350F

On a lightly floured surface, roll out your first sheet of puff pastry to about 1/4″ thick. Using a sharp knife or pizza cutter, divide into 6 equal sized squares. Place aside and do same with second sheet.

With the first set of pastry squares, place ~2 tbsp of jelly in the middle of the square and place your brie in the middle of the jelly. Skewer the brie with your popsicle or lollipop stick and then repeat for all 6 squares.

In a bowl, whisk your egg and water together and brush the egg wash around the edges of the of the pastry square you have the brie and jelly in, and top with the second set up pastry squares (this will help them stick) and then use a fork to seal the edges by crimping around the whole square (being extra careful to seal around the stick).

Brush the egg wash over the top of each square and bake on a baking sheet with parchment paper for 12-15 minutes (depending on your oven, mine took 13).

Cool for 5 minutes and serve!

I hope that you enjoyed this summer party menu and are able to use some of these for your next get together! It’s an easy, stress free way to have a feast for your friends and family! Thanks again to Woolwich Dairy for sending me great product and being just as excited to work with me on this.

Chocolate Chewy Vegan Bites

A few weeks ago a friend was asking me what kind of healthy “cheat” snacks I could make that were vegan. I thought about this- I mean, you could go with a potato based anything, and a lot of candies and junk foods are vegan, but I wanted something that could be easily made at home and be picked at for a few days. I tried out a few variations of these bites and are thrilled to say these are the winners! My chocolate chewy vegan bites!

Ingredients

1 Cup Cooked White Quinoa
¼ cup unsweetened cocoa powder
¼ cup agave nectar (or maple syrup)
¼ cup naturally sweetened peanut butter (with cane or coconut sugar)
1 tablespoon chia seeds
½  teaspoon pure vanilla extract
Pinch of fine grain sea salt
¼ cup unsweetened coconut flakes (divided into 2)

Instructions

  1. Line a small baking sheet or any flat surface with wax or parchment paper.
  2. Add all ingredients to a medium sized mixing bowl. Stir well to combine.
  3. Scoop tiny bite-sized spoonfuls onto the baking sheet (about 12 total). With the remaining coconut, sprinkle over the bites. Place baking sheet into the freezer and allow to set for 3 hours until bites are fully hardened.
  4. Enjoy straight out of the freezer. The fudgy bites will start to soften at room temperature after about 7-10 minutes.