“What’s your favourite cookie?”
I asked that to someone I was just getting to know recently.
Don’t ask me why, but it seems to be something that comes up with most people that I meet. Part of it is a weird fascination with wanting to know what people actually enjoy vs. what they think they should enjoy (the amount of times I have had people tell me they love stale oatmeal cookies, or undercooked chocolate chip cookies instead of saying a more “acceptable” answer like “fresh baked chocolate chip cookies with a crispy outside and gooey inside” has led me to believe that I am not the only one who is okay with a dessert or cookie that could be considered “wrong” from a traditional baking point of view). So when “TIM TAMS!” was blurted out with excitement I was surprised! I knew it was some sort of Australian dessert, but wasn’t entirely sure what it was. So always up for a challenge, I said I’d make him some homemade ones and he could tell me if they were better than store bought.
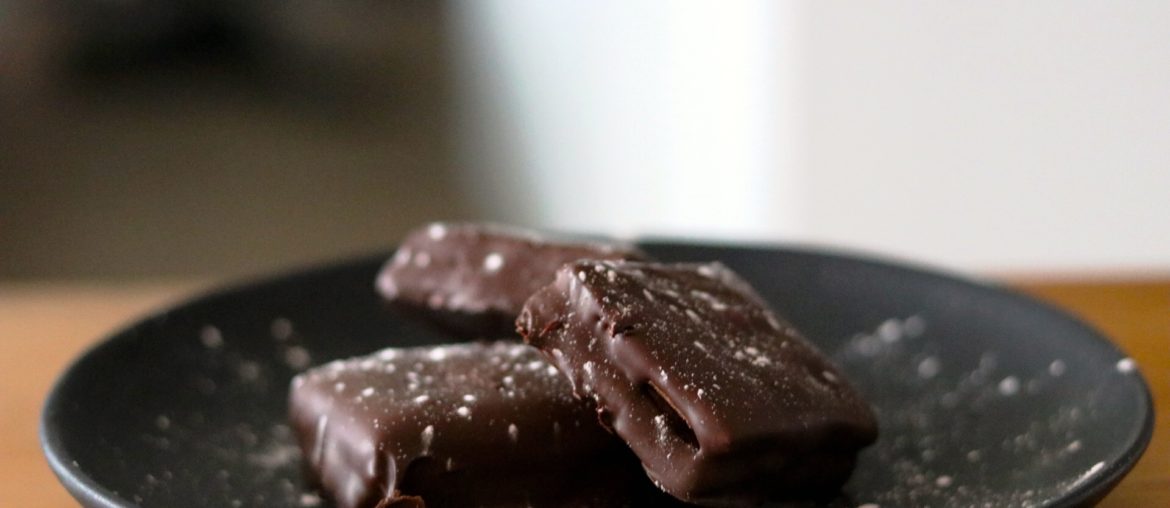
I realized quickly I should probably figure out exactly what it is. Wikipedia has this great description on them with their history here. But basically: “Tim Tam is a brand of chocolate biscuit made by the Australian biscuit company Arnott’s. It consists of two malted biscuits separated by a light chocolate cream filling and coated in a thin layer of textured chocolate.”
After searching for a few tips and tricks on how people made these, I headed into the kitchen and decided take a swing at these my way. I have shared these with not only the person who loves Tim Tams (who LOVED these) but also a few work partners of mine and friends and family. Every single one of them has come back asking for more. That’s always the best result!
Ingredients:
For the cookies:
1/2 Cup Unsalted Butter (Do not try and sub in salted butter in this recipe)
1 Cup Icing Sugar
1 Egg at Room Temperature
1/3 Cup (Heaping) Unsweetened Cocoa Powder
1 Cup All Purpose Flour
Small Pinch of Salt
- Using a stand mixer fitted with the paddle, or a hand mixer and a large bowl, combine your room temperature butter, and powdered sugar and cream until it is nice and fluffy (it will likely become quite a pale colour, that is exactly what you want). Once that’s done, add in your egg and beat until it is incorporated. The colour should lighten a bit. Now add your cocoa powder and beat until smooth (you don’t want lumps). Now fold in your flour and salt (mix these together first) until everything is incorporated. Your dough should be soft and almost sticky.
-
Layout a large sheet of wax/parchment paper and scrape out your dough onto this. Take a second sheet and place on top of your dough. Carefully, roll out the dough between these sheets making sure you are shaping it into a rectangle. You don’t want your dough too thick- roughly 1/4-1/3″ thick (remember, you’ll be stacking cookies on top of each other so you don’t want them too thick). Move this carefully onto a tray and place it in your freezer for 30-45 minutes until firm. (This way it won’t stick to the paper when you remove it).
-
Preheat oven to 350F (if your oven tends to vary in temperature quite a bit, pump this to 370F. Now line baking sheets with parchment paper.
- Remove your dough from the freezer and with a sharp knife (or pizza cutter) and cut it into small squares (traditional Tim Tams are rectangles, but I found the square shape made for a much more pleasant eating experience). You should end up with roughly 22 or 24 squares (enough for 11-12 Tim Tams). Place these evenly on the baking trays and bake them for 10-12 minutes (you know they’re done when they almost have the look of a brownie on top. Don’t overcook them or they’ll be very dry). Leave them out to cool completely.
For the filling:
1/2 Cup Unsalted Butter
1-1/4 Cup Icing Sugar
1 Heaping Tbsp unsweetened cocoa powder
1 Heaping Tbsp Ovaltine (if you don’t love malted drink powder, hot chocolate mix works well too)
- Using either a stand mixer or hand mixer, cream the butter and sugar. Sift in your cocoa powder and ovaltine. Using ~1Tbsp of icing per cooking, spread or pipe an even layer of filling on half of the cookies and top with the other cookies. Refrigerate.
For the Coating/Final Step:
1 Bag Chocolate Chips or 8oz Chocolate Squares (Milk or Dark Chocolate)
1 Tbsp Coconut Oil
- To make the coating, you can melt the chocolate on stove top (not my favourite) or in the easier (and really the only reason I use it) microwave. Combining the chocolate and oil, microwave on high in 30-second intervals, stirring between. After your second melt, you’re likely ready to go. (Should be smooth)
- Using a fork, dip the cookies into the melted chocolate and place them onto a cooling wrack (if you place them back onto the baking sheet I find the chocolate sticks to the pan). Once you’ve done this with all the cookies, place them back in the fridge until solid.
Enjoy!
