Tag

home cooking

Browsing

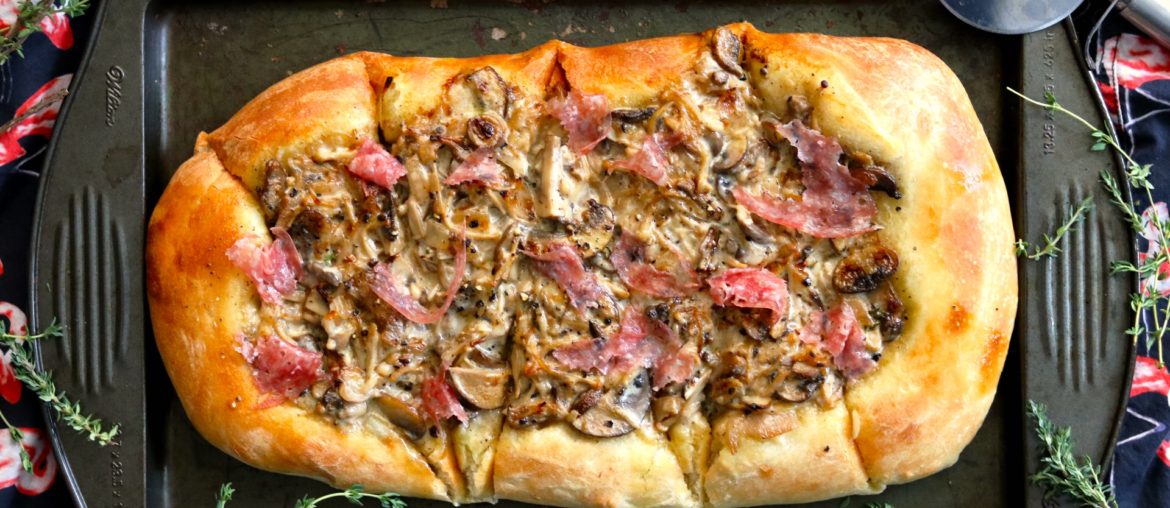
Creamy Mushroom and Prosciutto Pizza

I have always been a fan of “different” pizzas. When I would order from a pizza shop it would never be a regular “Normal cheese, normal sauce” kind of ordeal. It was always “Light cheese, extra sauce,  toppings, additional sauce on top” or “No cheese, thick sauce, toppings that will sit well in the sauce” order. It must have driven the local chain pizza store insane. (Before you start thinking my taste is awful, I do enjoy a great Italian pizza, and will never make substitutions to ones I order at restaurants. This is simply me being picky about the basically cardboard pizzas you order for $6.99 on a Wednesday night when it’s cold and you don’t want to go outside).

Because of this pickiness with my pizzas, it usually meant I don’t make them myself. Everyone has that one meal or item they don’t make because it’s not worth it to them. Some of my friends only buy their curry out because it’s too much effort at home. Some friends only buy the rotisserie chickens because it’s so much cheaper than buy a raw whole chicken and making it yourself. For me- it’s pizza. That was until I was inspired by the creamy mushroom pizza in Martha Stewart’s Appetizers book. I realized that making pizza didn’t have to be that hard (especially if you cheat like I did and buy ready made dough). I have made some changes to the original recipe, making it more to my liking. Let me know what you think!

Ingredients:

3Tbsp unsalted butter
1/3 cup finely chopped shallots
1 to 1-1/2lb mixed mushrooms (depending on how much mushrooms you want)
1/2 cup pinot grigio
3/4 cup heavy cream (35%)
Pizza dough (store bought)
2 Tbsp olive oil
3 Tbsp fresh tarragon leaves
Prosciutto (for serving)

Instructions:

  1. Preheat oven to 500F with rack in lowest position and a baking sheet (with rim) upside down in the oven.
  2. Melt butter in large pan over medium heat and add shallots cooking until they’re softened (about 3 minutes).
  3. Add mushrooms,salt, pepper, and cook for about 5 minutes or until softened.
  4. Add wine, bring to a boil and cook until evaporated. Add cream and cook until mostly absorbed (about 5 minutes)
  5. Stretch your dough into an oval (about 6″ wide by 18″ long) and place on parchment paper. Brush your dough with 1tbsp olive oil and add the mushroom mixture (leave about a 1/2″ border)
  6. Place your pizzas onto the baking sheet and bake until golden brown and crisp (about 12-14 minutes).
  7. Remove from oven, sprinkle with tarragon and prosciutto and serve!

I hope you enjoyed this- if you did take a picture of your creation and share it with me at @JackDHarding on Instagram!
Grilled Portobello Burgers

As I’m sure anyone who has worked to maintain a healthy body, or working towards their ideal healthy self will know- it’s not easy. There are good weeks, and there are bad. There are times when it seems like months go by and you’re proud of all the good you’ve done for yourself. And then…. well, there are those weeks and weekends where everything you want, you have. It leaves you a little sluggish to say the least.

I had one of those weekends last weekend. I went to visit Detroit (I had never been!) and was happily surprised by the fact my hotel had  Burger King in it (there aren’t many in Toronto, and as I’m sure anyone who visits the US, or lives there and comes here knows- fast food is better in the US). A few Whoppers and very cheap chicken nuggets later and well… it was time to treat myself a little better.

I decided to start a week of clean eating, eating all vegetables and keeping meat out of the diet for 7 days. I’ll be sharing my other meatless recipes this week, but here was my first- Grilled Portobello Burgers.

Start off with fresh portobello mushrooms.

portobello mushrooms on cutting board

Combine olive oil and balsamic vinegar in a bowl, and dredge the mushrooms in the bowl (I found a smaller bowl worked because the cap was the perfect size to spin in size and get total coverage.

portobello mushrooms in olive oil and balsamic vinegar

Heat a grill to medium high, and put the mushrooms cap side down first to start, for about 10 minutes. Flip and grill for another 5-10 minutes or until soft.

portobello mushrooms grilling on grill

Once you remove them from the grill, set aside and start building your buns. I started with a sunflower seed pesto (recipe here).

sunflower seed pesto on toasted bun

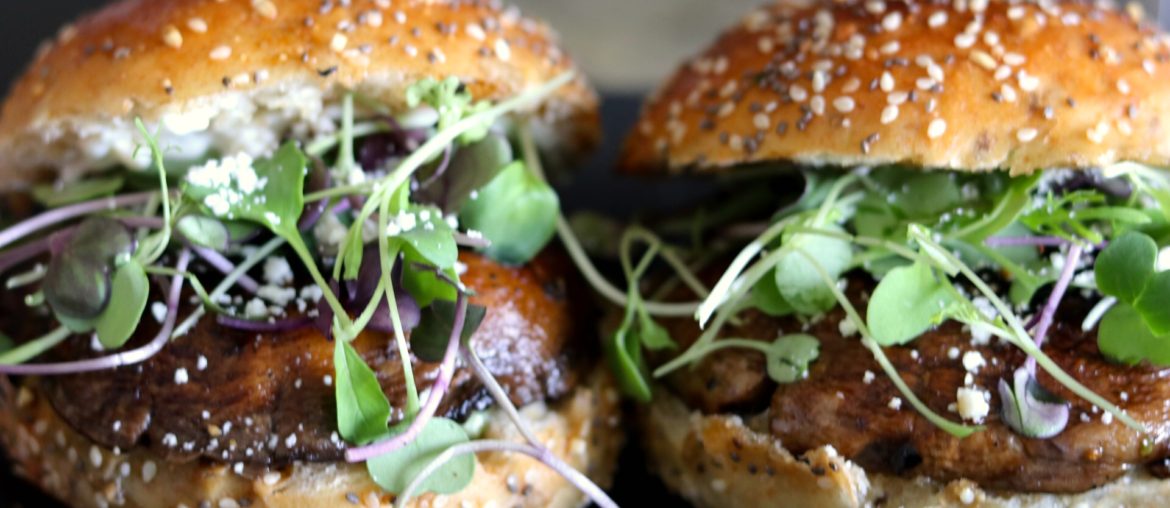
Once that’s done, I added the mushroom, some micro-greens (I like pea shoots) and a touch of hot sauce.

Portobello mushroom on bun with greens

Finish by adding any of your favourite toppings and additions, and seal with the top bun! A delicious heart healthy treat. This will definitely help you on Meatless Mondays!

Portobello Burgers with greens on plate

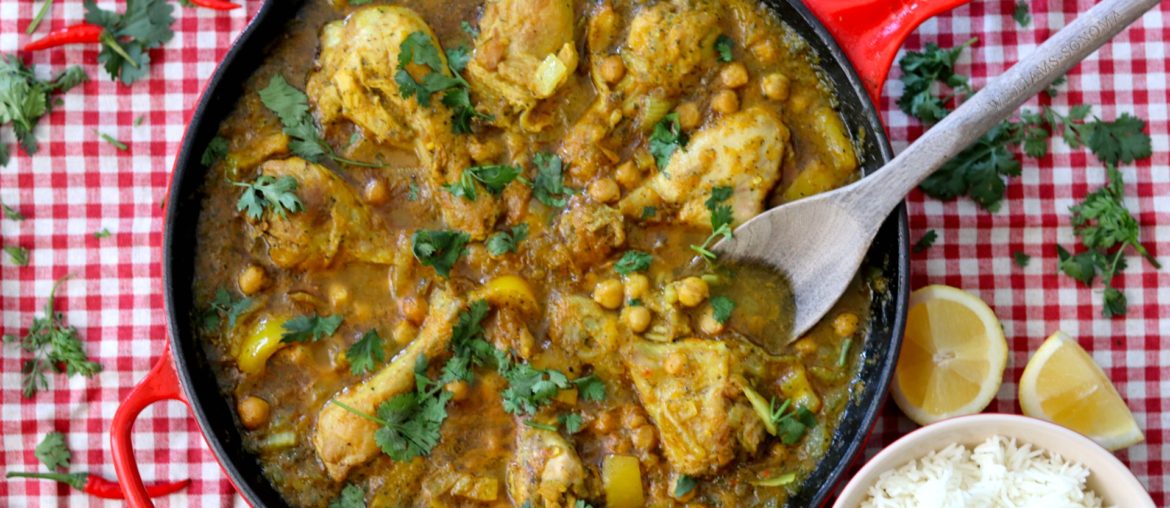
Yellow Pukka Curry Recipe

For whatever reason, curries were something I never attempted to make. Whether it because they’re a cheaper option when going out, or because I was a little intimidated by how much goes into them (probably this one) I never thought “Oh let me make curry for dinner.” That changed when I was trying to think of a nice dinner to make for a Sunday night, and went “I haven’t had curry in ages, why don’t I try it?” Now this recipe isn’t for the light of heart in that it takes a while to make, and if you’re not patient, it can be frustrating to make (there will be a lot of standing and mixing and stirring, and a fair bit of moving parts. That being said, this was a delightful recipe and made for a great dinner. (This recipe is an adaptation of Jamie Oliver’s Recipe found here). 

Ingredients

  • Two large yellow onions, chopped
  • 6 cloves of garlic
  • 10cm (about 3 inches) garlic chopped
  • 2 yellow peppers, chopped roughly
  • 1 Oxo Chicken stock cube
  • 3  red chilis
  • 1/2 bunch of coriander (more or less depending on how you like it)
  • 1 1/2 tsp liquid honey, warm
  • 1 heaping tsp turmeric
  • 2 heaping teaspoons curry powder
  • 8 chicken drum sticks (skin on or off, I prefer with no skin)
  • olive oil
  • 1 can of chickpeas (drained)
  • 1 heaping tsp of tomato paste
  • 3 cups basmati rice

Instructions

  1. Peel and chop the onions, garlic and ginger and remove the seeds from the peppers.
  2. Put 1 onion, 1  yellow pepper, the garlic and ginger into a food processor. Crumble in the stock cube and add the chilli (I keep the seeds to make it a bit hotter), the coriander, honey and spices. Now use the pulse setting on your processor until it resembles a paste (you’re going to be adding this to your chicken and adding water later, so don’t worry about it being really fine).
  3. Place a large cast iron skillet (30cm or larger) on medium-high heat and fry the chicken drumsticks (pull the skin off first if you’re like me, otherwise keep it on) with the olive oil for 10-15 minutes. It should be golden brown (and crispy if skin is on). Once cooked, remove and put aside. Keep the skillet on the heat.
  4. Chop up the other onion and pepper (I prefer the onion finely chopped, while keeping the pepper a bit bigger) and add to the pan to cook for a few minutes (about 4-5 minutes). Add the paste you made earlier, and cook for another 5 minutes.
  5. Add in 4 cups of boiling water (500ml). Now add the drained chickpeas and tomato paste, as well as some black pepper. You’re going to want to stir well, so everything gets mixed nicely.
  6. Add the chicken you removed back to the skillet. You likely won’t have a lid for the skillet, so use a piece of aluminum foil to cover. You’ll want to reduce heat and simmer for 45-50 minutes. The sauce should get thick and darker.
  7. When you only have 15-20 minutes left before the sauce is done, cook your rice (in 5 cups of boiling water). Cook for about 15 minutes (a little less if your rice absorbs quickly).
  8. Serve the curry in the skillet in the middle of your table, and place over the rice on your plate!

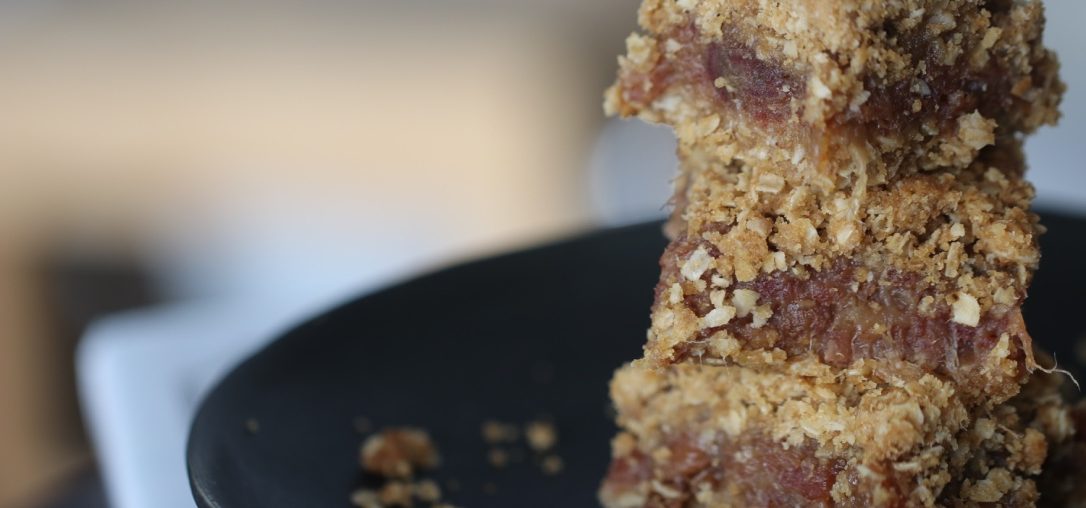
Date Square Recipe

Ingredients:

1 1/2 cups rolled oats
1 1/2 cups sifted pastry flour
1/4 teaspoon salt
3/4 teaspoon baking soda
1 cup packed brown sugar
3/4 cup butter, softened
3/4 pound pitted dates, diced
1 cup water
1/3 cup packed brown sugar
1 teaspoon lemon juice


  1. Preheat oven to 350 degrees F (175 degrees C).
  2. In a large bowl, combine oats, pastry flour, salt, 1 cup brown sugar, and baking soda. Mix in the butter until crumbly. Press half of the mixture into the bottom of a 9 inch square baking pan.
  3. In a small saucepan over medium heat, combine the dates, water, and 1/3 cup brown sugar. Bring to a boil, and cook until thickened. Stir in lemon juice, and remove from heat. Spread the filling over the base, and pat the remaining crumb mixture on top.
  4. Bake for 20 to 25 minutes in preheated oven, or until top is lightly toasted. Cool before cutting into squares.

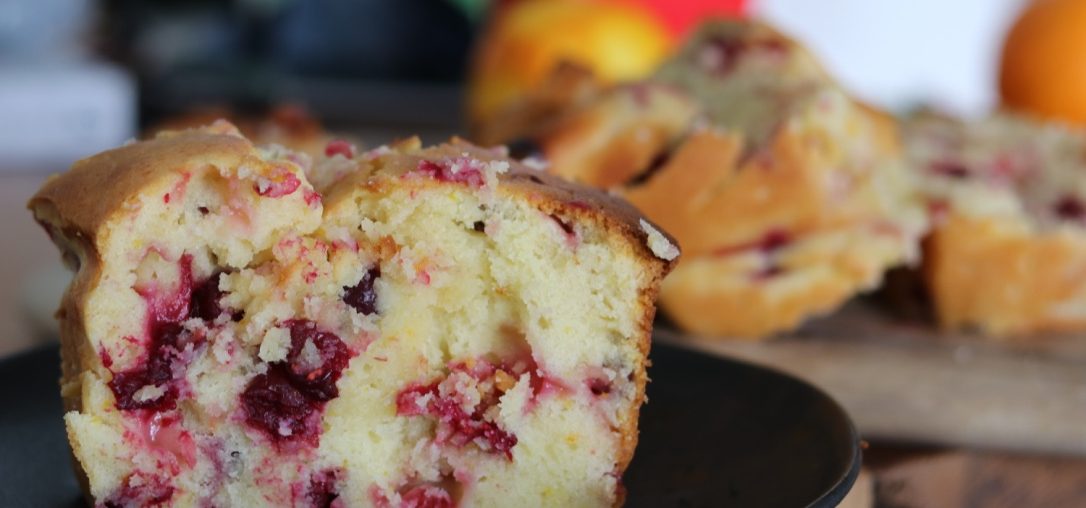
Orange Cranberry Loaf Recipe

Ingredients:

2 cups all-purpose flour
1 1/2 teaspoons baking powder
1/2 teaspoon baking soda
1/2 teaspoon salt
1 tablespoon grated orange zest
1 1/2 cups fresh cranberries
1/4 cup butter, softened
1 cup white sugar
1 egg
3/4 cup orange juice

  1. Preheat the oven to 350 degrees F (175 degrees C). Grease and flour a 9×5 inch loaf pan. Whisk together flour, baking powder, baking soda, and salt. Stir in orange zest, and cranberries. Set aside.
  2. In a large bowl, cream together butter, sugar, and egg until smooth. Stir in orange juice. Beat in flour mixture until just moistened. Pour into prepared pan.
  3. Bake for 1 hour in the preheated oven, or until the bread springs back when lightly touched. Let stand 10 minutes, then turn out onto a wire rack to cool. Wrap in plastic when completely cool.

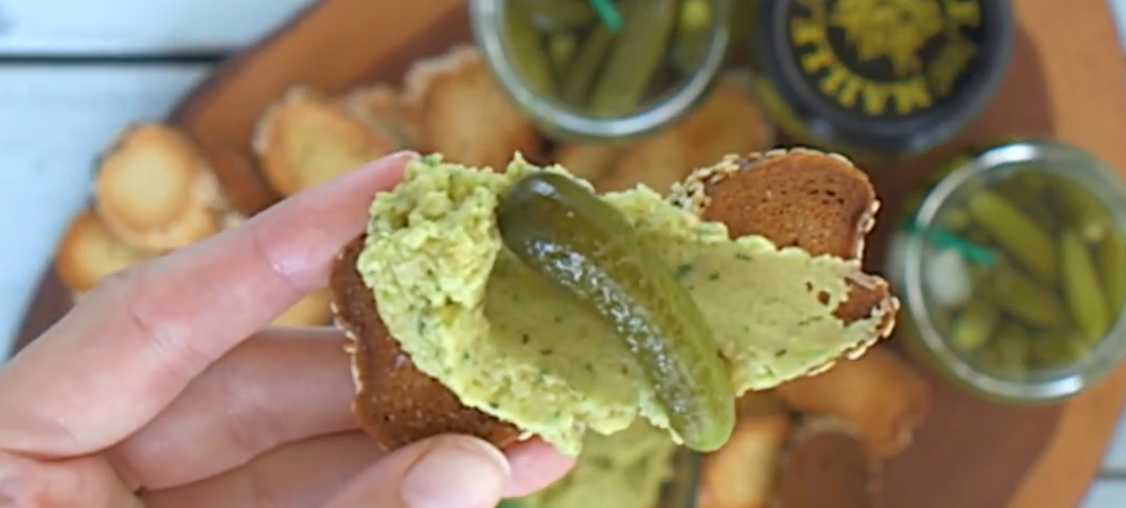
How to make hummus from scratch

One of the hardest things for me not to do is walking into the grocery store and buy a bag of chips and a big jar of chip dip. There is something so right about dipping your chips into something made of almost all fat (and not the good kind). Looking for ways to continue along my journey of health and bettering myself, I knew that I had to cut away the chips and dips early on. That doesn’t mean that I didn’t spend a long time trying to replace it with a healthy alternative. I had made salsas and guacamole and other dips, and they were always good, but they were never “it” for me. When I realized that hummus could make an amazing dip for crackers and toasted breads (I don’t know why I didn’t put 2 and 2 together sooner) I became obsessed with trying to find the perfect recipe — that was when I started testing every add-in possible. Excited to work with Maille who makes the best mustards, cornichons, and gherkins, I thought “What better way to elevate my hummus to a whole new level?” That was when it hit me, Gherkin Hummus!

This hummus recipe was not only really simple to make, but the addition of the Maille Gherkins with Caramelized Onions really brought the hummus to a place it hadn’t been before for me. It added a slight tartness from the pickle, and the sweetness from the cartelized onions. Another great thin about the Maille cornichons is that they have 2g of sugar per serving and do not contain sucrose and fructose like other major brands. The less added, the better a lot of the time! A wonderfully simple and delicious treat for summer day on your own, or hosting with a large group of friends like I did, this hummus will win everyone over. Watch the video I made with Maille below, and if you want to make it yourself, the recipe is at the bottom of the article.

Want to make it yourself? Here is how it’s done!

Ingredients:

  • 2 16-oz cans of chick peas (about 4 cups)
  • Maille Gherkins with Carmelized Onions
  • small handful fresh basil leaves
  • 2 tbsp olive oil
  • black pepper
  • garlic salt

In your food processor, add your chick peas (I like to break it up by doing one can, blend, then add the second can). Once smooth (and not too thick) add in the Maille Gherkins, basil, olive oil, and the garlic salt and pepper. (Pro tip: if you find it a bit too thick, add some of the pickle juice to the mixture and blend again). Blend until smooth. I like to serve with some finely chopped basil on top, but you can serve on it’s own, or topped with whatever garish you and your guests like!