Tag

baking blog

Browsing

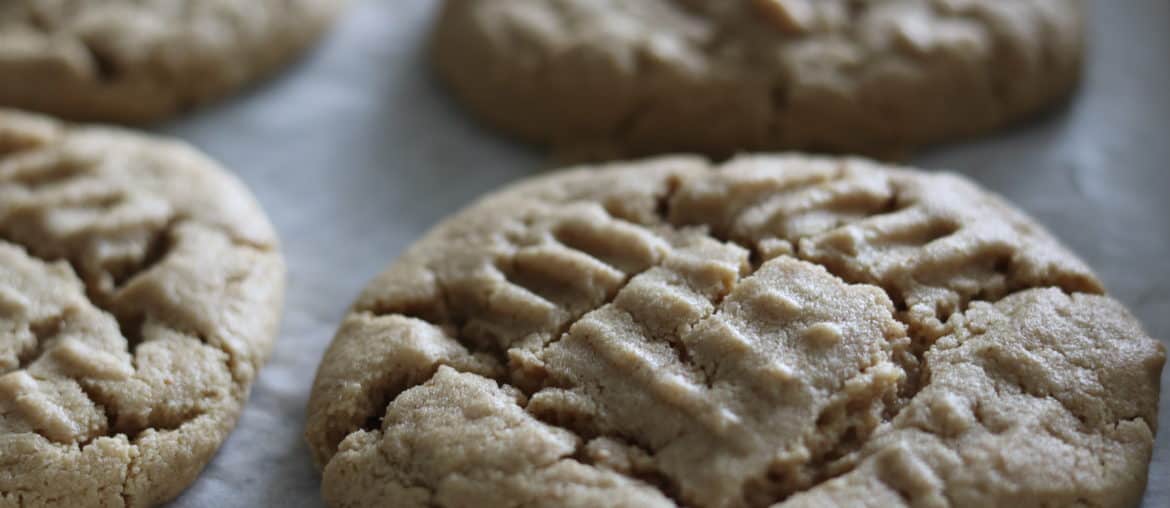
Best Peanut Butter Cookie Recipe (And they’re gluten-free)

Peanut butter cookies are one of my all-time favourites. For a lot of Canadians around my age, the recipe from the back of the Kraft Peanut Butter Jars was the gold standard for parents, and I remember having those beautiful little golden discs with the cross-hatching on top on plenty of days after school.

As I learned to bake, they were also one of the first cookies I made because: 1) They’re delicious and 2) They’re easy to make!

I have played around with this recipe for years, and I’m really happy with where I’ve gotten it to. I hope you enjoy it!

Ingredients:

11/2 cup natural peanut butter (sugar-free)
3/4 cup brown sugar
3/4 cup granulated sugar
3/4 tsp baking soda
1/2 tsp salt
1 extra-large egg
Flaky sea salt (Maldon’s Smoky Sea Salt is the best for this)

Instructions:

Preheat oven to 350F and place rack in centre of the oven.

In a large bowl, beat peanut butter and sugars together with baking soda and salt until mixture is very smooth (this is important).

Beat in the egg until the mixture starts to resemble dough and holds together.

Using a 1/4 cup sized scoop, roll portioned balls of dough and place on a parchment-lined baking sheet (2-3″ apart, they will spread while baking), using a fork to flatten the balls and cross hatch the top. Sprinkle flaky salt on top of each cookie.

Bake for 10-12 minutes until golden brown. Let cookies cool on the baking sheet for 10 minutes and then move to a wire rack to cool completely. These cookies will last in an airtight container for 5 days or can be frozen for up to 3 months).

I hope you like these as much as I do! If you make them, please tag me @JackDHarding on Instagram and feel free to DM with any questions or comments!
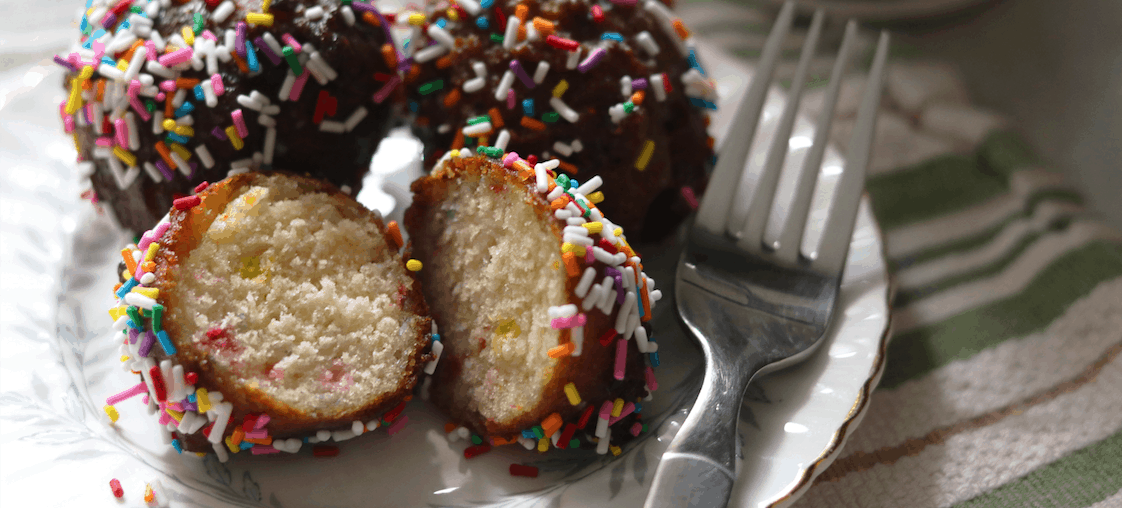
Sprinkle Donut Holes

If you’re an American friend, the term “TimBit” isn’t going to mean much to you which is why this recipe was called “Sprinkle Donut Holes” instead of what any Canadian would call it “Sprinkle Timbits.” If you grew up in Canada you’ll know that the term donut hole never caught on because the chain Tim Hortons sold “TimBits” (their version and branded with their name) and heavily marketed them for years. Now you can tell a Canadian traveller quite easy when they step into a bakery and ask for one. I’m really excited to have created a great recipe for these that not only fries well, but has a great mouth feel and are delicious! I guarantee that you’re going to love these!

Ingredients:

Donuts:
2 Cups All Purpose Flour
3 Tbsp Brown Sugar
1 1/2 Tbsp Baking Powder
1 Cup Milk
1 Large Egg
1 Tsp Pure Vanilla Extract
1/4 Cup Salted Butter, melted
1/3 Cup Sprinkles

Glaze: 
2 Cups Powdered Sugar
1/3 Cup Milk
1/2 Cup Sprinkles (for coating)

Instructions:

  1. Whisk flour, brown sugar, baking powder, and 3/4 teaspoon salt together in a large bowl, make sure it’s well mixed.
  2. Combine the milk, egg and vanilla extract in a smaller bowl and add into the flour mix. Add in the melted butter and the sprinkles and mix until a dough starts to form.
  3. In a large heavy bottom pot, heat at least 2″ of vegetable oil to 350F. Aside, line a wire rack with paper towel.
  4. Using an two spoons, spoon the dough into the hot oil. Fry until they’re golden brown (about 1-2 minutes per side) depending on how quickly your oil starts to cool. Using a slotted spoon, transfer to the rack andlet cool. 
  5. Once the donuts have cooked and are cooling: whisk powdered sugar, sprinkles, lemon juice, milk, vanilla extract, and salt together in a bowl to make the glaze. It should be smooth.
  6. Place a wire rack on a baking sheet. Dip each donut hole (one at a time) into the glaze and place on the rack; allow excess glaze to drip off before serving. (I add some extra sprinkles while they’re drying, but this is totally up to you).

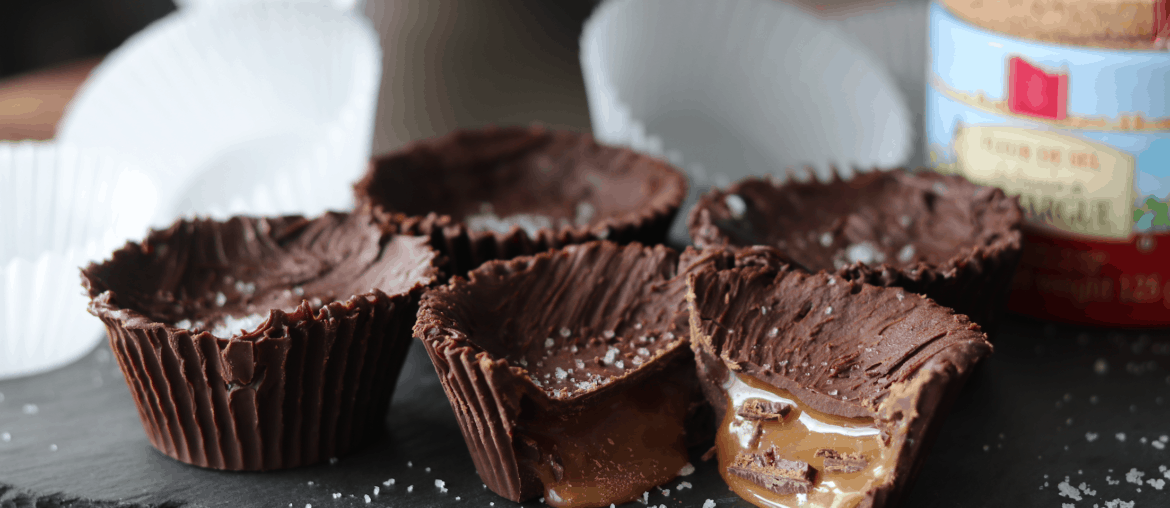
Easy to Make: Salted Caramel Chocolate Cups

This is going to become a new household favourite for you once you’ve had it. It definitely has for me! These are not only easy to make, but they’re really easy to eat (hah). I was excited to make use of the Sea Salt Flakes I got at an event celebrating Windsor Salt’s 125 Year Anniversary! 

On August 16th, Windsor Salt hosted Table for 125, an exclusive culinary celebration with Canada’s cultural and community leaders, held around a single communal table. Hosted by celebrity chef Eden Grinshpan, more than 125 guests shared an inspired, curated meal featuring signature dishes created by Grinshpan to celebrate all Canadians who bring joy and positive change to their local communities. At the event, Windsor Salt also honored their first-ever Joy Squad, a group of ten local heroes and role models who are making a difference in their communities.

Ingredients:

  • 4 1/2 cups semi sweet chocolate chips
  • 2 1/2 cups caramels, chopped, unwrapped
  • 3 1/2 tablespoons milk 
  • Course Salt/Flake Salt

Instructions:

  1. Place cupcake wrappers in muffin tins (these are going to be big cups, not small like a traditional chocolate cup (think Reese’s)).
  2. In a large microwave safe bowl, add your chocolate chips and microwave at full power in 30-second intervals, stirring between blasts until smooth.
  3. Scoop an ice cream scoop worth of chocolate (~2tbsp) into each liner. You want to make sure about 1/4-3/8 of the chocolate is left for the top. Use a brush (pastry brush is best) to then spread and brush the chocolate up to the top of the liners. This will be a bit tricky so be patient. Place in freezer.
  4. In a medium sized microwave safe bowl, combine the caramels and milk and microwave on high for 120 seconds. Stir. Blast at 30 second intervals after that stirring each time until smooth.
  5. Remove muffin tin from freezer. Pour caramel into chocolate cups until about 2/3 full. Return to the freezer for 10 minutes.
  6. Remove muffin tin from freezer and use the pastry brush to brush the remaining melted chocolate over the top of the caramel being sure to cover all of the caramel (you don’t want any gaps). Sprinkle the salt on each cup and freeze for about 20 minutes.
  7. Remove muffin tin from freezer and peel away the cupcake wrappers from the chocolate cups (don’t put too much pressure on the cup- you don’t want to break them). Store in an airtight container or in the fridge for up to a week.

Let me know if you make these and if you do, tag me @JackDHarding and let me know if you made any changes.

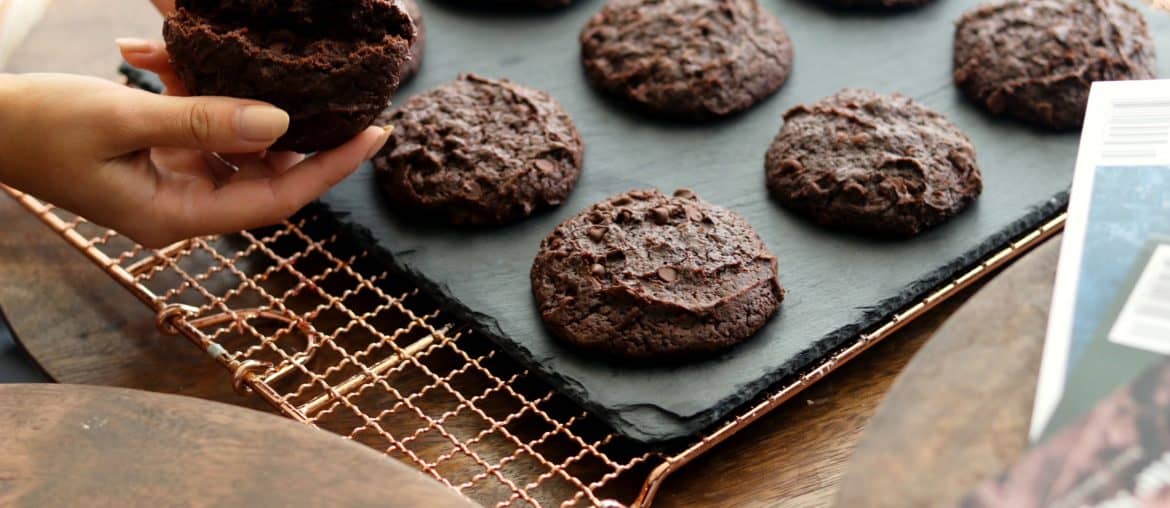
Super Fudgey Chocolate Cake Cookies

These are the kind of cookies that make you change your outlook on cookies. I typically love a thin, crisp cookie, and these are NOT those. They’re cakey, they’re thick and they’re delicious and you will thank me after you’ve eaten one.

Ingredients

  • 1 cup (level) + 2 tablespoons all-purpose flour
  • 4 Tbsp dark cocoa powder (unsweetened)
  • 1 teaspoon baking powder
  • 1/4 teaspoon salt (heaping- you want less than 1/2, but more than 1/4)
  • 2 1/4 cups semi-sweet chocolate chips
  • 3 1/2 tablespoons unsalted butter
  • 1/2 cup granulated sugar
  • 1/4 cup light brown sugar, packed
  • 2 large eggs, at room temperature
  • 2 tablespoons soy milk 
  • 2 teaspoons vanilla extract

Instructions

  • Preheat the oven to 325F. Line 2-3 baking sheets with parchment paper and set aside.
  • In  a medium bowl, whisk the flour, cocoa powder, baking powder and salt together, making sure to mix well.
  • In a larger bowl (microwave safe) combine one cup of the chocolate chips and all of the butter. Heat them on high for 20 seconds at a time, mixing between each blast to ensure even melting and that they don’t burn. Once they’re melted and can be whisked together smoothly, add in the vanilla and the sugars. Once that is done, add the eggs one by one and finish with the soy milk.
  • Incorporate the dry ingredients into the wet and stir- you do NOT want to over-mix this as they’ll end up way too tough. 
  • Add the remaining chocolate chips by folding gently. 
  • Using an ice cream scoop (about 1/4 cup) scoop the batter and place the cookies on the tray one by one, leaving about 1 1/2 inches between each cookie (better to err on the side of caution and give more space).
  • Reduce the heat to 300 and bake for 17-20 minutes. You’ll know they’re done when they tops get dark and have a bit of a shine.
  • Remove from oven and let completely cool on tray. Use a spatula to remove once cooled.

These will store for about 5 days in fridge or in an air tight container, but I doubt they’ll actually last that long with how delicious they are. I hope you enjoy these! Make sure to tag me @JackDHarding and let me know if you make them!

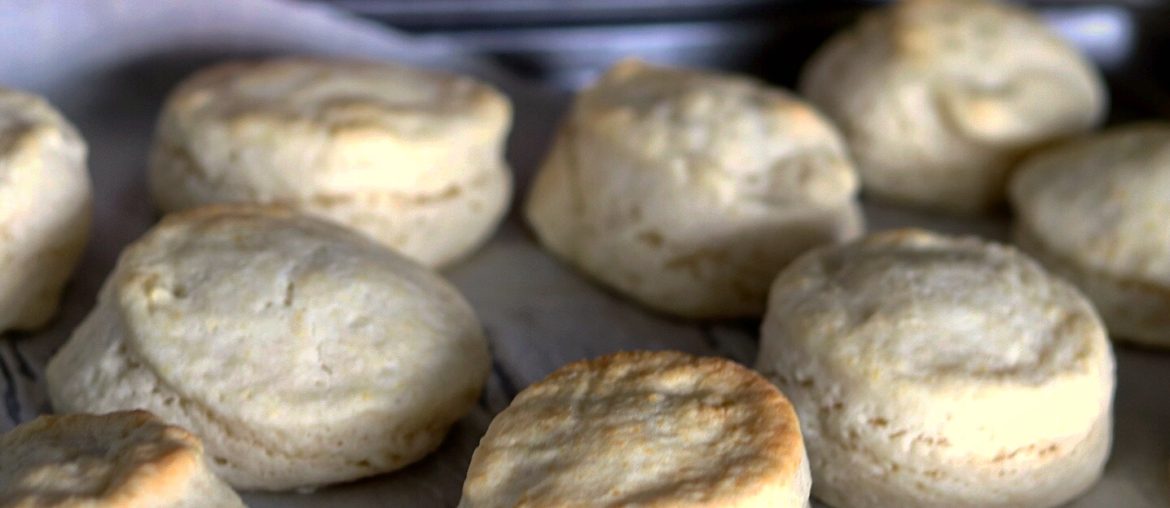
How to Make Homemade Biscuits

There is something really fulfilling about making your own bread. Watching your creation go from a bunch of flour and sugar and salt to rising in the oven, and finally something delightfully warm and delicious you can have for breakfast, lunch or dinner is amazing.  However, the thought of spending a day of your time to *hopefully* have a loaf of bread turn out is something most people aren’t ready for (I mean, honestly, I’m not ready for that most of the time and I LOVE baking).

So what’s the next best thing? Homemade biscuits! No yeast needed, simple and easy to make, and devour-able for a few days with jams, jellies and spreads.

Ingredients:
3 cups All Purpose Flour
1 teaspoon salt
1 tablespoon baking powder
1 tablespoon sugar
6 tablespoons butter, at room temperature
1  cups cold milk (plus up to 3 Tbsp) (whole milk while make your biscuits more tender, I made mine with skim milk which made them  a bit more dense)

Instructions:

  1. Preheat your oven to 425°F with a rack in the upper portion. Get out a baking sheet and line with parchment paper.
  2. Measure your flour by adding it spoonful by spoonful into a measuring cup and adding to a large bowl.
  3. Mix together the flour, salt, baking powder, and sugar.
  4. Add the butter to the flour mixture using a food processor (you can use a fork or pastry blender as well, but I find the even consistency from the food processor is best) until has a bread crumb like consistency.
  5. Start to add the milk, table spoon by table spoon, over the flour mixture. You’ll want to do this quickly for about 10-15 seconds until a dough has formed. If the texture is dry and won’t come together, keep working it (and add up to the other 2 Tbsp of milk if it needs it to be cohesive).
  6. Place the dough on a lightly floured work surface. Pat it into a rough rectangle about 3/4″ thick. Fold it into thirds like a letter and roll gently with a floured rolling pin until the dough is 3/4″ thick again.
  7. Using a biscuit cutter, or the rim of a glass, cut the dough into circles (I like round biscuits) or if you’re scared of waste, cut the dough into squares with a sharp knife.
  8. Place the biscuits with the bottom side up onto the baking sheet and brush them with a bit of milk to help them brown nicely in the oven.
  9. Bake for 15-20 minutes (keep an eye out, they’ll go from lightly browned to burnt fairly quickly).
  10. These will keep for 2-3 days if wrapped and stored at room temperature. You can also freeze for longer periods of time.
  11. Bake the biscuits for 15 to 20 minutes, until they’re lightly browned. Remove them from the oven, and serve warm.

I hope you enjoy these! If you decide to make them, feel free to tag me at @JackDHarding and let me know how they turned out!